
My workshop was with Gail McManus who is fabulous and if you ever have the chance to work with her, take it! She offers a workshop each summer on the East Coast and one on the West Coast. (I will also mention that she does offer financial aid although, having worked with her, I wouldn't bat an eye at paying the full fee if I could afford it.) Here's an article by Gail which was published in the Waldorf Today newsletter: Painting with Children in Waldorf Schools
I worked with her in the Arteum painting studio -- in Ghent NY, literally right up the hill from Hawthorne Valley Waldorf School -- and I was blown away by her professionalism and true expertise.
Prior to working with Gail, I learned wet-on-wet watercolor painting from workshops with Barbara Dewey and Jean Miller (of Waldorf Without Walls and Waldorf Inspired Learning, respectively) in Bowerston OH and at Rahima Baldwin Dancy's Waldorf in the Home conference in Boulder CO.
Gail, however, is my closest link with Rudolf Steiner. She studied for years in Dornach. Her teachers at the Goetheanum in Dornach were Gerard Wagner and Elisabeth Wagner-Koch. Gerard's teacher at the Goetheanum was Henni Geck, with whom he began studying in 1928. Henni Geck developed a new style of painting from indications which she got straight from Rudolf Steiner. These indications are called the Motif Sketches.
Thus,
- Rudolf Steiner
Henni Geck
Gerard Wagner
Gail McManus
me!
Isn't that exciting!?! She didn't teach painting like anything I'd ever seen before. It was very stimulating. Before I get into her wet-on-dry methods, I'll share the wet-on-wet, which is what I learned first.
For wet-on-wet painting:
- get a large plastic storage tote and place a few inches of water in it (you can use a casserole dish for a half sheet of paper)
- carefully lower one edge of the sheet of watercolor paper into the water and then slide the paper the rest of the way in
- allow to sit for about half a minute
- if soaking multiple pieces of paper, slide each paper under the one before, so that when you remove a sheet of paper, the top one has soaked the longest
- carefully lift the top piece of paper out of the water and hold like a diamond, so that all of the excess water pools at the bottom of the paper and drips off the bottom tip
- take a clean dry unused kitchen sponge which you have reserved for painting and hold it beneath the drippy tip while you walk to your table
- carry the paper to your plexiglas painting board and lay down slowly so that no air is trapped beneath the wet paper
- use your clean dry sponge to slowly smooth the paper, working horizontally across the paper and going from top to bottom, so that it is flat and not bubbly and all of the excess water is picked up
- when you mix the concentrated paint with water to make today’s paint colors, use little canning jars (4 oz. quarter pint jars) - they are much easier to open and shut than baby food jars
- save extra diluted paint by storing it in the fridge - it will mold at room temperature
- keep a jar of rinse water handy as well as a piece of scrap watercolor paper for testing to be sure your brush is completely clean
- when you rinse your brush tell your child NOT to leave the brush standing in the water; you can remind him of the little dwarf from Snow-White and Rose-Red (Grimm) who was so finicky with his beard - the brush is like the beard and you take good care of it
- when you are done, flip the paintbrush over and “write” your name in the corner of the painting with the wooden end of the brush; the brush will press down on the paper and paint will rush in and pool there and when your painting dries your letters will show
For wet-on-dry painting:
- write your child’s name and the date on the back of the paper
- lay your sheet of watercolor paper on a painting board made of 1/4 inch or 1/2 inch plywood or masonite
- stretch it taut by attaching masking tape all the way around all four edges of the paper - smooth the tape from the center of the piece outwards - go slowly and tape the top, then the bottom, then one side, then the other
- prepare today’s colors of paint - the painting studio had white porcelain 1 oz. ramekins of hardened air-dried concentrated paint and then extra little glass dishes in which to mix up today’s colors - to mix paint (either a plain color or a blended color) wet your brush and lift up some of the concentrated watercolor, place it in another dish, then add water and/or other colors as needed
- always keep a largish piece of scrap watercolor paper (of the same kind you are painting on) to test the strength of your colors and to check that your brush is clean after rinsing it
- we also had an eyedropper of clear water on our easels in case a color had to be made lighter while we were using it
- always paint in natural light, never artificial light
(our easels, below, were set up in natural sunlight only, below marvelous skylights which included carefully angled mirrors, letting in an amazing amount of light)


Watercolor Painting Supplies
For painting, you'll first want to decide on paints, brushes, paper, and a painting board.
Painting on dry paper is NOT blasphemous! In fact, Steiner recommends painting on dry stretched paper in a question & answer session following a lecture; these notes can be found in the Handwork book available FREE in the Online Waldorf Library, page 95.
I like stretching the paper with masking tape but the Arteum painting studio actually uses gummed tape and slightly wet paper. You then cut the painting off the board with a utility knife, leaving some of the tape around the edge. You can see this on my paintings.
The children should paint at an easel according to Elisabeth Wagner-Koch, or work with the painting board propped upright if one must be seated. She also recommends good long-handled flat brushes of marten or sable hair, number 18 or 16.
Finally, there is the question of the brand of paint and paper. Elisabeth Wagner-Koch writes of transparent watercolors such as Windsor & Newton paints. You can also use Stockmar of course, which is what we had at the painting studio in Ghent NY.
The classic Stockmar Waldorf school assortment is a warm and a cool yellow, a warm and a cool red, and a warm and a cool blue.
It is important to be able to see which is warmer and which is cooler and painting them side by side each day is helpful to learn this!
My teacher, Gail McManus, does not purchase golden yellow and instead mixes it by putting a tiny bit of red into the lemon yellow. She suggests buying the following colors: lemon yellow, carmine red, vermillion, ultramarine blue, Prussian blue, mauve, and black.
She STRONGLY recommends Arches bright white cold press 140 lb watercolor paper in the 22" x 30" size, which can be found at Dick Blick. She buys the pack of 5 sheets of paper and cuts each one into fourths, making a sheet of 11" x 15" paper. The painting board you get should be large enough to accommodate this with a little extra around it for the taping. It's about $5 per sheet of paper, so $1.25 for a quarter sheet.


a sponge to wet the pre-gummed tape


Painting Exercises
You know how play is the work of the young child? In this method, FORM is the WORK of color. Form arises out of color. We had to think about how a color would come into another color, and what is needed in a painting as it develops. NOT what shapes are needed but what colors are needed and where they would like to be.
She discouraged me from photographing the work in her collection of paintings by students from her many years of teaching. She prefers that we bring a box of colored pencils and sketch the paintings instead, so that we each have to work out the details of the composition for ourselves.
Where to find concrete painting exercises?
My painting teacher recommended The Individuality of Colour: Contributions to a Methodical Schooling in Colour Experience by Elisabeth Wagner-Kock & Gerard Wagner. This book is $50.00. But it contains invaluable information on painting correctly in a Waldorf manner.
Remember, consulting clients can always borrow books from my Lending Library! That's $99.00 (per family, NOT per child) for a year of lending privileges at my library plus an hour long phone call, a personalized school year plan, custom pages on the website, and recommended resources to help you with each main lesson block.

Some of my paintings, both in progress and finished, are below. Naturally, my cell phone did not do them justice! Since I'm teaching the Old Testament blocks this year, I asked her to help me focus on Creation paintings.
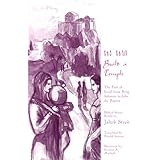
We are doing three blocks of OT stories, with the first being And There Was Light by Jakob Streit. This is available online for free to download as a PDF from The Online Waldorf Library, or you can get it from Amazon for $18.00.


Day Four - moon


She had other beautiful Creation paintings like Day One (the void), and Day Six (animals -- a painting of a lion) but I did not have time to paint them.
I am a very slow painter and her method was very challenging for me. Challenging, but rewarding!


 Immersive Experience
 Immersive Experience
 Immersive Experience
1 comment:
Beautiful painting! I am hoping that I can attend this workshop next year! Thanks for sharing!
Post a Comment