Wednesday, September 23, 2026

Geodesic Dome... Conquered!


HOORAY!

First of all, color coding is key.

For our dome project (see my previous post on Buckminster Fuller and Geodesic Domes), we used

The 5 orange straws are the star at the top of the dome. This helps keep everyone on your team oriented spatially as you assemble the structure.


We also used


These
jumbo 20 inch long straws are awesome, and having all the different colors really helps!!!


STEPS IN ASSEMBLY

1. Lay out straws by color. Cut the yellow and orange straws to 17.5 inches.

2. Lay out paper clips by color. Make 4-way, 5-way, and 6-way connectors.

    Use the yellow paper clips to make the 5-way connectors
    (these are for the centers of the orange and yellow stars)

    Use the green paper clips to make the 4-way connectors
    (these are for the base; they go into the "feet" of the yellow stars)

    Use half of the white paper clips to make five 6-way connectors
    (these are for the top points of the yellow stars)

    Use the remaining white paper clips to make ten 3-way connectors
    (these are for the "hands" of the yellow stars and will join together to become 6-way connectors upon assembly of the dome)


3. Make the orange star (which is the top of the dome). Set it aside.

4. Make a yellow five point star.

5. Add the following connectors to the open ends of your yellow star

    4-way connectors at the feet of the star (left and right)

    3-way connectors (1/2 of six) at the arms of the star (left and right)

    6-way connector on the top point of star
    note: this connector will go into the orange star "cap" at the end


5. Insert the pink straws into the connectors all the way around your star to form a pentagon panel. These panels are the sides of your dome.

6. Make 4 more yellow stars / pentagons in this way. You will have five in all.


6. Assemble your pentagon panels into a circle, with the left and right arms touching. The white 3-way connectors there will need to be linked together to form a 6-way connector. At the base and at the top of the space between the panels you will place a pink straw. It will look like an hourglass shape.

On the floor, all the way around the base of the dome, you will see green connectors and pink straws.

The first row of triangles above the base will alternate between having yellow sides and having pink sides.

There will be five pentagon panels that make up the circular walls of the dome. One pentagon panel will be the cap on top.

yellow stars, highlighted

the orange star proudly takes its place at the top of the dome


In my experience, it takes A LOT of people to help hold each panel in place while the pink straws are being put in between them.


The design will be very floppy and it can be quite frustrating... until the cap is placed on top, at which point it will snap into place and become rigid and very strong. Buckminster Fuller came up with an amazing building!


This post contains affiliate links to materials I truly use for homeschooling. Qualifying purchases provide me with revenue. Thank you for your support!

Buckminster Fuller & Geodesic Domes

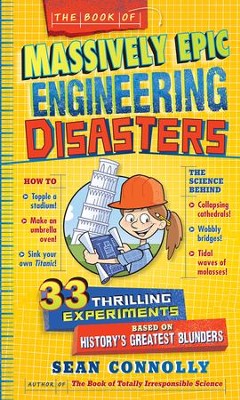
Science Club weeks 2 & 3 are follow up to our week 1 disaster. We are learning about the work of Buckminster Fuller and his Geodesic Domes.

The combination of curve and triangle in dome structures makes them strong and stable during an earthquake. Dome houses are also economical and environmentally friendly, requiring only a small amount of materials.


According to Buckminster Fuller: Poet of Geometry by Cole Gerst, Fuller's personal Dome Home in Carbondale IL "took only seven hours to build."

The American Institute of Architects calls the geodesic dome “the strongest, lightest and most efficient means of enclosing space known to man.” (pacificdomes.com)


Preparation:

straws - Perfect Stix 20" Extra Long Neon Straws - Pack of 300

    35 straws, 20 inches long

    30 straws, cut to 17.5 inches

    our dome design is smaller and simpler than the illustration above, which shows 3 colors for 3 strut lengths


paper clips - enough to make the three following types of connectors

a huge thank you to the creator of DesertDomes.com!


the connectors slide inside the straws to hold them together, as shown below


Buckminster Fuller Book Display


also


Activities:

review last week's disaster

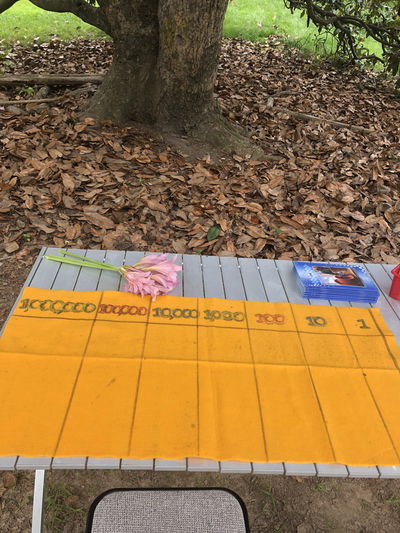
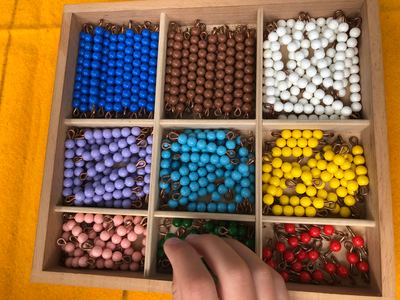
explain Richter Scale and demonstrate with a math material to scale

    level 1 - 1

    level 2 - 10

    level 3 - 100

    level 4 - 1000

    level 5 - 10,000

    imagine level 6 - ten 10,000s

    imagine level 7 - a hundred 10,000s

    imagine level 8 - a thousand 10,000s

    imagine level 9 - ten thousand 10,000s!!!

a level 6 would be ten of these 10,000 squares!


recall the destruction in the 1811 New Madrid Earthquake (8.1)

look at Earthquakes infographic in Earth: By the Numbers, pp.14-15

read excerpts from Buckminster Fuller: Poet of Geometry

use straws and paper clip connectors to build a geodesic dome


DOME NOTES

As part of a Housebuilding summer camp in August 2018, my three daughters successfully built a geodesic dome with these straws:

I could never have done it without Natalie and Leah!


This year we were determined to do it again. And so I am going to take VERY detailed notes as to how to be successful!

We had a lot of questions. Do you make the stars first (some with 5 spokes and some with 6)? Do you start at the top and work your way down? Do you start at the bottom and work your way up? Do you make all the connectors first or construct them as you need them?

As soon as my students and I figure this out, I will write it up!


Articles & Links:

    10 Largest Earthquakes Ever Recorded
    usgs.gov

    Many thanks to desertdomes.com for help with the math. This is an amazing website which helps you build your own geodesic dome. Simply put in the radius of the dome you wish to build, and it will tell you how long to make your struts and how many of each length you will need, plus how many connectors of each type you will need.


Field Trip:


This post contains affiliate links to materials I truly use for homeschooling. Qualifying purchases provide me with revenue. Thank you for your support!

Tuesday, September 22, 2026

Local Art Show - "Spooked or Spoofed"

We are excited to kick off our Local Artists theme this year with a field trip to "Spooked or Spoofed: A Celebration of Cryptozoology" at Sharp Museum.


Wed Sep 16

read The Secret Three by Mildred Myrick

do pages 7 & 8 from Games with Codes and Ciphers by Norvin Pallas

read "SIU Museum seeks cryptid-themed art" article from May 15, 2026

circle every word in the article that you think shares a base with < cryptid >

SWI exploration of < crypt >

This was a very rich base to explore! We found three different kinds of affixes (prefix, suffix, connecting vowel letter) and a hyphenated compound.

base word

    < crypt >

    early 15c., cripte, "grotto, cavern"
    from Latin crypta "vault, cavern"
    from Greek krypte "a vault, crypt"

    see complete entry at etymonline


base + suffix

    cryptic

    cryptid, cryptids


base + prefix

    encrypt, encryption, encrypted, encrypting

    decrypt, decryption, decrypted, decrypting


base + connecting vowel letter < o >

    cryptocurrency

    cryptozoology, cryptozoologist


hyphenated compound words

    cryptid-themed


One student circled < creature > because "it seems like it must go," but we did the word sum and found that the base of < creature > is < create >.


Mon Sep 21

review < crypt >

add < cryptology > and < cryptologist > to our list

do pages 9 & 10 ("Why Johnny Had to Stay After School") and 22 & 23 ("Lincoln's Rail Fence") from Games with Codes and Ciphers

Note: If you want to make more of a lesson out of the Cardan grille, Gerolamo Cardano is in Mathematicians Are People, Too: Stories from the Lives of Great Mathematicians (vol. 2, "The Conceited Hypochondriac").


This post contains affiliate links to materials I truly use for homeschooling. Qualifying purchases provide me with revenue. Thank you for your support!

Monday, September 21, 2026

Notes on Teaching Cross-Stitch

Once children are 10, they can start cross-stitch in Handwork. A favorite project here is the cross-stitch pincushion!


How to Sew Up a Cross-Stitch Pincushion


My notes from my AAP Handwork teacher training for this are buried in my Handwork Teacher Training - Spring 2021 post, so I'm putting them here!


cross-stitch

    6 count Aida cloth from Paper Scissors Stone
    size 3 DMC pearl cotton
    size 20 tapestry needle

    this is not a counted cross-stitch kit with pre-made design
    they create their own designs (4-way or 8-way symmetry)

    designing a pattern on paper and then stitching it is a different skill; we want to focus on one skill at a time

    top & bottom make a difference! mark the top of your cloth with ribbon (the "red bird" can't be on the side)

    have the students walk the cross-stitch pattern using large dots on the floor before they ever begin to stitch it


    *** right handed children ***

      situate yourself on the righthand edge of the cloth

      you will be heading LEFT

      then place the needle behind the fabric
      in the lower lefthand corner of the square you want to do

      "up and to the right, over 1
      down and to the right, and you are done"


    *** left handed children ***

      situate yourself on the lefthand edge of the cloth

      you will be heading RIGHT

      then place the needle behind the fabric
      in the lower righthand corner of the square you want to do

      "up and to the left, over 1
      down and to the left, and you are done"


    enjoy that feeling! there stands the X

    then think, what is the next square I'm intending to do?

    after a while, they begin to be able to look forward to the next thing and anticipate where the needle should be, so you can then say "down to the right (or left) and over 2"

    note: it is actually "over" when you are walking the dots on the floor but when you are sewing it you are really going under the fabric at that point! the "overs" are where you are traveling on the backside of the fabric, and it makes a tidy little row of lines


    the "up (or down) and to the right (or left)" is the part of the verse where you are working diagonally on the front of the fabric


    we began with a 20 square piece of 6 count Aida cloth

    first make the border (across top and bottom edges) as a chance to practice the stitch (if you do this correctly, on the back you will have only straight bars and no X's) and then do the border on the sides

    do the outside edge in a strong color!


    for the symmetrical design, divide your cloth into four quadrants ("backyards") and start in the square closest to center of the cloth, staying in whatever "backyard" you're in (remember, the needle goes in the lower L hand corner for R hand children and the lower R hand corner for L hand children

    we want the design to unfold for them... do 7 squares in that floss color (they must be touching in some way) and then match it in all four backyards

    switch to a new color... do 7, 8, or 9 squares (remember to start in the center again)

    don't plan it! just let it happen


Once you learn how to cross-stitch there are all kinds of wonderful projects you can do!