Thursday, December 31, 2009
Happy New Year!
Ice Skating
Looks like our next family read-aloud story is going to be Noel Streatfeild's Skating Shoes

Wednesday, December 30, 2009
How to Homeschool
I hope these free resources are helpful to people!
Cooking with Children
The first is Cooking with Children.

Waiting Until the Change of Teeth


These are not my favorite beginning readers but they are short and give a feeling of success. The description by the author talks about a child's short attention span but that's only if you're cramming reading down a poor two year old's throat. My daughter -- who was ready to read -- read 6 in her first sitting. She insisted that we sit in the car outside the bookstore and read them right away. She zipped through all 24 of these books in a few weeks, asked in early December for set 3, read it, progressed through the Dick and Jane books, and is now picking picture books off the shelf and decoding them. This morning she read all of What Mommies Do Best/ What Daddies Do Best

Mind you, she began to read on November 14th. Today is December 30th.
I have a good friend who is a traditional teacher and thinks Waldorf is pure baloney. But when I talked to him about Leah and the "change of teeth" idea, he came up with an interesting point. He said that waiting until the child was (these are his words) "past developmentally ready" meant that reading was EASY which makes it FUN which means they are excited to do it and soak it up. I certainly can testify to that. A bored restless tired child who is forced to sound out words ad infinitum can only lead to associations of reading being unpleasant tortuous work. Instead, I have a child who begs me to not turn off the light at night so that she can read a little longer and is literally up at sunbreak so that she can get up and read.
This is my experience. I've never done a true Waldorf way with the dictated/written/transcribed main lesson book pages alongside a little phonics teaching and the child looks down at what he or she has written one day and has that AHA! moment. This is because my children are in school and I'm no longer able to homeschool. But I can testify that waiting until the change of teeth has worked well for Leah.
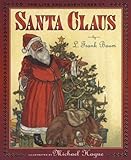
The Life and Adventures of Santa Claus
My daughters ADORE this story and ask for it all through the day. "When are we going to read The Life and Adventures of Santa Claus
Monday, December 28, 2009
Pumpkin Date Bread
I hope Janet likes it!
Basket Stitch
Basket Stitch
Rows 1 and 7: knit all the way across
Rows 2 and 8: purl all the way across
Rows 3 and 5: knit 1, purl 4, knit 1 -
repeat this sequence to the end of the row
Rows 4 and 6: purl 1, knit 4, purl 1 -
repeat this sequence to the end of the row
Rows 9 and 11: purl 2, knit 2, purl 2 -
repeat this sequence to the end of the row
Rows 10 and 12: knit 2, purl 2, knit 2 -
repeat this sequence to the end of the row
directions by Bernadette Murphy
P.S. As a bonus (it's nice having all this yarn in the house), Natalie is currently finger knitting mitten strings for all the pairs of new gloves I bought the girls. Since I got so many colors of cotton yarn, she has found yarns that match each glove/winter coat combination. The new gloves (and new long johns and new fleeces) are for Snow Day, our planned trip to Wisp Resort in Western Maryland on December 31st to go skiing/snowboarding/snowshoeing/ice skating/snow tubing and whatever else the girls want to try. They can't wait!!!
Saturday, December 26, 2009
The Dictionary Game

Christmas Eve I visited with a family and they taught me a game I had never played before, the Dictionary Game. This is a great game for the Lower or Upper Grades -- or for adults to play -- so I am passing it on. I recommend The Official Scrabble Players Dictionarybecause it has very unusual words in it (it can be harder than you think to find a word in a standard dictionary that no one in your party knows the definition of) PLUS it boosts your Scrabble know-how!
How to Play the Game:
Assemble your group. You can put a non-reader or non-writer with a reader or writer if younger kids want to play too.
Choose one person to begin: the Leader. That person takes the dictionary of your choice and looks through it, calling out words until he/she finds a word that no one in your group knows the meaning of. It's not fun to cheat so if you secretly know the word's meaning, fess up! Once the Leader finds a word that no one knows, he/she reads it out loud, spells it, and tells the part of speech.
Pass out slips of paper and pencils to each person.
The Leader writes down the correct definition of the chosen word. Everyone else writes down a made up definition that they think sounds like a possible real definition of the word. The goal is to trick others into thinking your definition is the correct one.
All slips of paper get passed to the Leader. When we played, we put the slips into a bowl in the center of the room and the Leader collected them when each person was done writing their definition.
The Leader opens all the slips without revealing the handwriting on them and reads them aloud. Usually twice, so people can think of which definition sounds most likely.
Each person states which of the definitions they believe is the correct one.
After everyone has voted on the definition of their choice, the correct definition is revealed and the points are tallied.
The Scorekeeper tallies the points. There are 3 ways to earn points.
1) If you guess the correct definition instead of one of the fakes, you get a point.
2) Every time you fool someone and that person chooses your definition instead of guessing the correct one, you get a point.
3) If NO ONE guesses the correct definition, the Leader gets one point for each person in the group, not counting him/herself.
Now pass the dictionary to the next person in the circle and that person becomes the Leader.
At the end of the game, tally up all the points!
This post contains affiliate links to materials I truly use for homeschooling. Qualifying purchases provide me with revenue. Thank you for your support!
Knitted Cotton Dishcloths

Zen and the Art of Knitting: Exploring the Links Between Knitting, Spirituality, and Creativity
According to author Bernadette Murphy, cotton yarn doesn't stink. :-) Sounds like a plus to me. I bought nine different colors of Peaches 'n' Creme today and set them by my bedside table and I'm planning on happily trying out new stitches over the course of my vacation. You can go online and look up free stitch patterns (here's an example) or you can buy her book (which, for some bizarre reason, Amazon has on sale right now for $4.27) and read it, enjoy it, and then use some of her stitch ideas.
Just cast on the desired number of stitches and knit until your work forms a square.
Candy Bar Fudge
It cooks in the microwave so preparation is super simple. Three dirty bowls (a snap to clean up). And no candy thermometer necessary!
Cocoa Blocks
The recipe directions state: Swirl these blocks into a mug of hot milk and enjoy luscious hot chocolate. Fun! We haven't tried them yet, so all I can say is that they are SUPER-EASY to make and look delish. Only downside is that you have to wait all night for them to set up.
Homemade Gifts
Other gifts we wrapped today:
Homemade soaps (the melt-and-pour kind). Natalie added dried lavender buds to hers. Becca added blueberry seed. Leah added crushed apricot kernels.
Bookmarks. Simply cut out of cardstock and decorated with crayons and stickers.
Ornaments. Salt dough ornaments in animal shapes, painted and hung on each gift as an added decoration.
I had the girls paint ornaments first and set them to dry. Then they all began their bookmarks and I invited people one at a time to make soaps with me. After naps, I invited one child at a time to make a recipe with me. (Recipes follow).
Another nice homemade gift idea was the one I made for my mom. I found a template for a gift certificate online. You import it to Word and change the wording to be whatever you want. I made her a Luxurious Massage gift certificate. Instead of Price I changed it to Personal Message and then wrote "Merry Christmas!" You can do this for grandparents or friends: A Playdate to the Zoo, for example. They print up four to a page so you could make a whole coupon booklet.
Thursday, December 24, 2009
Maple Pumpkin Muffins
My grandparents and aunt have invited me to come over to their house tomorrow morning for Christmas breakfast. I am baking a double batch of these (conveniently thereby using a 15 oz. can of pumpkin and 12 oz. can of evaporated milk) to bring with me.
Notes:
I didn't have any pumpkin pie spice so I used ground cinnamon, freshly ground nutmeg, ground ginger, and ground cardamom to flavor these.
I find that doubling the recipe yields 3 dozen muffins.
Chocolate Peanut Squares
First recipe: Chocolate Peanut Squares
This recipe has a lot to recommend it. First, it uses up ingredients I have on hand (namely, powdered sugar and peanut butter). Second, it doesn't require that I heat up the oven. Third, I can make it in advance and wrap and give it as a gift later.
Wednesday, December 16, 2009
Mancala -- For Free
Yes, folks, with a simple cardboard egg carton, a pair of scissors, some tape or glue, and a handful of paper clips or small stones, you too can be playing Mancala in your own home for no money at all!!!
Brilliant.
Perfect for a classroom -- make one, teach the kids the rules, and then everyone can make their own version to take home.

Tuesday, December 15, 2009
Seed Paper Ornaments
You will need:
cotton linters (find these at Michaels or a local craft store)
OR torn up white paper
colored tissue paper for dyeing your pulp (optional)
water
an old blender (or a new blender you don't mind destroying)
a measuring cup or scoop
two medium/large bowls
a colander or sieve
cookie cutter(s)
a flat surface which can get wet
two large cotton towels which can get stained
a large piece of cheesecloth
one or several cooling racks (used for cookies/bread)
packets of flower seeds
a hole punch and some ribbon (for hanging)
STEPS
1. Put your cotton linters or torn up white paper and your torn up tissue paper (optional: this either adds flecks of color to your white pulp or dyes it the color of the tissue paper) in a large bowl of water to soak. The longer the better. If soaking it overnight, I recommend you stick it in the fridge so it doesn't spoil.
2. Lay one of your old towels out on the flat surface (I used the combined surface of my washer and dryer since they are in the kitchen and handy). Lay the large piece of cheesecloth on top, leaving the edges free to overlap the paper ornaments later.
3. Lay out your cookie cutters on the cheesecloth. Set the other towel aside for now. You can do the same cookie cutter over and over and make all your ornaments the same shape OR you can use a variety. A shallow cookie cutter works best since you have to stick your fingers in it to spread out the pulp and you don't want to waste time trying to get your fingers into deep tight tiny corners. I used a star shape since it's pretty foolproof and still looks good after you've smushed it a bit to squeeze out the excess water.
4. Pour your cotton/paper/water mixture into the blender. Use a generous amount of water to paper ratio or you will burn up your blender motor very quickly. Perhaps 3 cups of water to 1 cup of cotton/paper pieces. We'll drain out the extra water later using the colander so don't worry. Pulse 30 seconds or until the paper and cotton is all chewed up and the whole thing is mushy. Sortof like an Office Depot smoothie!
5. Set the colander or sieve on top of the cotton/paper/water bowl containing the mixture you HAVEN'T blended yet and pour the pulp from the blender into it. The extra water will go back in to the yet-to-be-blended mixture, which is helpful. It also helps you because this will make your pulp thicker and less messy for the next step, which is where you shape the ornaments. So let it sit and drain for a bit.
NOTE: If you are adding seeds to your pulp, I suggest you add them now. Don't add it before you blend or you'll destroy them. If you try to stick the seeds on after you make the ornaments, you will find they don't stick to the pulp very well. So this is the best step for adding them in. I used yellow tissue paper for my dye and made golden stars but the seeds ended up muddying them a bit, so consider a darker paper color or simply go with pure white.
6. Dump the pulp in your colander or sieve into bowl #2 and carry it over to your cookie cutter mold(s). Using your fingertips, pick up a bit of the pulp and spread it around in your cookie cutter. Spread evenly all the way to the edges. When your paper is the shape you want, gently lift up the cookie cutter. If the pulp sticks to the cookie cutter, it's a little too dry so add a bit of water. The release should not be difficult.
7. Continue to pour and mold the shapes you want. Continue to mix new batches of pulp as needed. I recommend you go ahead and use all the pulp you've made, even if it means more ornaments that you were expecting (you can also use them as gift tags) because once you get into a groove it's really quick and fun; however, you can also freeze the pulp (squeeze out extra water) for another papermaking adventure on another day.
8. Lay the edges of the cheesecloth over your finished work (or put down another piece on top if you don't have any long edges -- this keeps the ornaments from sticking to the top towel) and put the other cotton bath towel over it all. Press down firmly to help absorb excess water. Then uncover the ornaments and lay them on the cookie rack(s) to dry.
Drying your ornaments:
You can iron them on low heat. You can air dry them. You can dry them in the sun. You can place them in a low oven with the door open. You can blow dry them. You can microwave them in short intervals. Whatever works for you!
My favorite papermaking book:

Saturday, December 12, 2009
Chicken Coop
For all of us who want a self-sufficient lifestyle, here's a chance to chip away at the dependence on grocery stores! The winner will be announced January 15, 2010. United States: Lower 48 only. Good luck.

Felted Soaps
Here are some simple instructions: So you'd like to... felt a bar of soap
My own personal observations are that it pays to go slowly and take care when first wetting the wool. Wrapping is key -- make sure NONE of the bar of soap is showing. I prefer white wool batting to trying to wrap it with roving. Batting works much better. It's also cheap! Then take little bits of colored roving and place it on top to make a design (like a small flower) or use colored pure wool yarn to wrap around your wool (this helps keep the batting in place and also felts in to the finished product and creates a swirly design).

wool batting from A Child's Dream Come True
Once you have your wool wrapped securely around the soap, hold it in one hand and gently sprinkle it with very hot tap water using the other hand. Do this until the entire project is very wet on all sides. Now, BEFORE you begin to rub vigorously, go around with your fingertips and make sure all the wool is touching itself. For example, if a little bit of wool is sticking out at an odd angle, it will felt that way and you'll have to cut it off later. The wool should form a smooth surface all around the soap. If you need to rearrange it and gently pat it smooth and rewet it, this is the time!!!!! It should encompass the soap like an organic piece, not bumpy, not lumpy, not gappy, not flappy. Like the peel on an orange. Then, you can dunk it and begin to rub with your hands until it's tightly felted and bubbles from the soap are starting to work their way through the outer layer. This is fun and easy for kids from preschool on up.
I used to dislike wet felting immensely because I felt like I never had enough control over the finished product and my felt always had gaps and holes in it. Then I learned that this is because the wool felts (locks together) much more quickly than I had previously thought, so it was locking up early on in a shape that I didn't want and I didn't have any way to make changes. Once it felts, it's done! All you can do from there is... well... nothing. You're stuck. With the soaps, though, you can put on another layer of wool batting around your mistake and go at it again. So it is a good project for beginners. Just make sure you have it the way you want it before you add all the friction from the vigorous rubbing.
Enjoy!
Art: Value

and then drew monster outlines and filled in their bodies with texture rubbings. We used block beeswax crayons to make texture rubbings of items around the classroom. My students loved it!
The next chapter, which we are studying in December, is the element of Value. In this chapter she talks about shading and shadows and drawing things to look 3-D. Some good picture books for this (illustrated in black and white, with plenty of shadows) are


Sunday, December 6, 2009
Reading Notes
Remember, that in the early years of recorder playing, the child is imitating you. That means YOU need to learn how to play it and therefore you need to learn to read music. So enjoy!

Saturday, December 5, 2009
Grammar: Noun, Verb, Adverb, Adjective

Under the lessons for Second Grade, she tells a lovely story about a little seed child who is woken up by a gnome early one spring. The seed child is so sleepy that she has forgotten her name and the gnome tells her it is "Violet." Then a fairy from each of the other elements comes to her and gives her a word: "Grow" from the rain, "Fast" from the air, and then lastly the sun fairy comes and gives her a color from the rainbow and it is "Purple."
The purple violet grows fast.
We added a page to our main lesson books about the four types of words: name, doing, how, and color. Since I'm teaching at a school with the Montessori grammar materials I used the colors for grammar in Montessori (noun is black, verb is red, adverb is orange, and adjective is medium blue).
Then we began the lesson on Doing Words, which is a wonderful lesson! You draw a picture of a child on the board and have the children in your class stand. They say in unison, "I stand." You write "stand" under the feet of the child drawing. Then the students name other actions that you can do with your feet and you write them by the feet of the child drawing. So on with the hands, eyes, ears, mouth, etc. Finally, you ask, "WHO does all these things?" The answer is "I" and you write "I" above the child drawing. Then the children do a page in their main lesson books with a drawing of themselves, labeled "I" at the top, and with all their action words. My students loved it!
Harrer really has written an excellent book and I recommend it for Grammar lessons in particular. There are no Grammar lessons in 1st grade; this subject begins in 2nd.
Friday, December 4, 2009
Teaching Children to Knit
I always have the kids make their own knitting needles first (see Kids Knitting by Melanie Falick). I used to have the children make polymer clay balls with different colors of polka-dots but then you have to have a "cheat sheet" listing whose colors are whose and that makes it complicated. I have switched to having everyone glue on a small acorn cap to the end of each needle and writing the initials of the child down near the pointed end with a red sharpie.
I used to use beeswax salad bowl finish (by Clapham's) to finish the needles but I found that kids usually put on too much and it never gets rubbed in all the way. Sticky sticky. This year we used grapeseed oil and it worked beautifully. You can only get a little bit on your fingertips at a time (I poured some into a dish and passed it around) and it gives the needles a beautiful shine. I keep extra sandpaper and grapeseed oil around at all times for people who need to do a little extra sanding and finishing. Usually, the children don't understand the benefit of having their needles really smooth until they experience having the yarn catch on a splinter or rough edge.
I have each child keep his/her knitting needles and ball of yarn in a brown paper lunchbag. These fall over easily so I put them all in a large bin. I have each child write his/her name on the bag and then decorate the bag with stick crayons on one side. Decorating the bag with a picture makes it much more distinctive and you're not searching through a pile of bags looking for a small black name.
Now... this is something new that I learned today. IT REALLY HELPS to write the verse you are using to teach the children to knit on the other side of their brown paper bag. That way, they always have it handy and they can use it when they forget what step comes next. THIS SIMPLE STEP changed my classroom today from a group of 13 children who needed help with their knitting constantly to a group of 13 children who kept saying, nevermind, I figured it out, I don't need help anymore. Amazing!
We are using the verse from A First Book of Knitting for Children:

Under the fence,
Catch the sheep,
Back we come,
Off we leap.
I cast on for every child using the knitted cast-on. 8 stitches. 10 meters of yarn. This is plenty to make a bookmark (our starting project -- doubles as a holiday gift) and having a short row gives a fast feeling of success.
I tell them the verse first and I tell them that there are 4 steps to learning to knit and that you do the same four steps over and over. The verse will help them remember the steps. Then I put my hands on their needles and hold them and they put their hands on their needles lower down (farther from the pointed end) and I say the verse one line at a time and explain each step and demonstrate as we go. I do the entire row of 8 stitches, saying the verse each time and having the children feel how the needles are moving. I bring the yarn forward between the two needles for the "Catch the sheep" line but that is the only part I do alone. They have their hands on the needles so they are following along with me. (I used to knit on my own needles with the children beside me but that didn't work at all... they never were able to figure out what I was doing. So I have learned to do it this way.) After I get to the end of the row, I show them how to switch the needles to the opposite hands and begin again and leave them to do it on their own. This is essential because they will be too timid to try it alone unless you stand up and walk away. The verse is there to guide them and, of course, I always come back and help anyone who needs it.
Friday, November 27, 2009
Hand Felted Jewelry and Beads

She is very interested in felting and, particularly, in making beads so this is the perfect book for her. It is about hand felting jewelry and beads. Yes, I know that sounds obvious but it really IS -- so, unlike other felting books which have a little of everything, this one is just about jewelry. If you are serious about trying to make your own hand felted jewelry, it's perfect. If you want to felt a little of this and that, try another book. Like Simply Felt.

Early Readers & 3rd Grade Grammar Block
Highly recommended!!!
The second part of this post is about the 3rd grade Grammar block which is what I usually recommend for this time of year. December is a bit of a void for homeschoolers so I think that letter writing (i.e. thank you notes) or story writing (creative writing for those long boring cold windy dark days when there's no snow yet) is the way to go. I am thinking of a Story Writing block. I just bought a fresh new batch of main lesson books from Paper Scissors Stone plus a few packs of size 38 felting needles. We did the wet felted mice for the Hospice Tree so I am ready to move on to more felting projects with my group.
Here are my thoughts:
vowels/consonants
cursive capital and lowercase
parts of speech (4 - from Dorothy Harrer's English book)
use of a dictionary & thesaurus
synonyms/antonyms
adjective webs
4 kinds of sentences/ending punctuation
capitalization rules
quotation marks & dialogue
elements of a story: setting, characters, conflict, solution
I was thinking we could wet felt flat wool pictures (scenery -- a meadow, a forest, a field, a pond) and then use them as story mats and make little needle-felted characters to move around on them.
By the way, for the Dialogue element, the book What Do You Say, Dear?


 Immersive Experience
 Immersive Experience
 Immersive Experience


