Monday, October 25, 2010

Organizing US State Info

As we travel we gather brochures, maps, postcards, etc from different states in the US. Or we cut out National Geographic clippings. You set things aside in case you ever study that state more in depth... How to organize it? I finally hit upon a solution. Here's what we did. A plastic milk crate with hanging file folders in it! I color coded the hanging files. 50 green hanging files for the states... I used the color blue for the territories, and one red folder for the capital, Washington DC. I alphabetized the states and territories and put a file folder for each one in its hanging file so they are ready to go. You can buy file folders which are specially made for projects and have three sides enclosed -- that would be nice for this. They are a little more expensive but worth it so that postcards and so on aren't falling out. You could use them to help your child with a research project, or gather momentos from each state as your family travels and see how many of the 50 states you can visit. I put a grey hanging file in the front of each category with a file folder -- what is a state? what is a territory? what is a capital? -- so that I can include basic information on these terms.

Here's a wonderful site that has a list of the US States and Territories in alphabetical order.


I suppose that you could make a milk crate for each continent, with hanging files per country, if you really got excited about this idea... the milk crates would stack which is handy. You could color code them by continent plus one for your home country, or you could just make them all the same color.


Thinking about storage in advance of starting a project is always smart. One of the teachers upstairs made herself a large scale set of landforms and water features by using paper mache (covered with gauze and rubber paint). She created each landform INSIDE a drawer of a cabinet. Then the drawers slide back into the cabinet when the student is done using them. She labeled the front of each drawer with the landform or water feature name and color-coded the labels so that students could see which ones made a pair (a lake is a body of water surrounded entirely by land, an island is a body of land surrounded entirely by water). Neat idea!

There are YouTube videos of people making landforms out of different modeling materials.

Here is also a link for FREE Land and Water Cards that can be downloaded as pdf files. Included are:

* Mountain — An area of land that's drastically higher than the surrounding area. A mountain also has a distinct summit (top)

* Hill — An area of land that's somewhat higher than the surrounding land. A hill doesn't need to have a distinct summit.

* Plateau — An area of land that is relatively flat and elevated about the surrounding land.

* Plain — A flat area of land, generally near rivers

* Valley — A low lying area of land surrounded by mountains, hills or plateaus.

* Peninsula — An area of land surrounded on three sides by water.

* Bay — A area of water surrounded by land on three sides by land.

* Lake — A body of fresh water that is relatively still

* Island — An area of land smaller than a continent that is surrounded by water on all sides

* Isthmus — A narrow piece of land between two larger bodies of water.

* Strait — A narrow body of water connecting two larger bodies of water.

* Ocean — The salty water that covers most of the Earth's surface

* Land — Dry land surrounded by the oceans

* Continents — Land is broken up into seven continents.

* Layers of Earth — The Earth is made up of three solid layers: The core, mantel and crust. The core consists of a solid center and a liquid outer core. The mantel is mostly liquid. And the crust is the thinnest layer, we live on the surface of the crust and all the continental plates are made of crust. Above the crust is the atmosphere.

Undersea Exploration

I had a parent share this with me -- it's a distance learning program with undersea explorers at the Hawaii Undersea Research Laboratory. Super cool!!! Here's the link for more information.

Next available mission dates are January 8-19, 2011. Sign up at the link above.

Curriculum Links:

WhaleTimes’ Taking Science Deeper™ (grade K-6) curriculum

NOAA-OER's Learning Ocean Science Through Ocean Exploration (grade 6-12) curriculum.


Sunday, October 24, 2010

WoolWorks!

I recently discovered a wonderful curriculum published by Harrisville Designs called Woolworks! Teaching to the Standards with Fiber Arts: A Curriculum Guide for Teachers of grades 3 - 8.

Find more details, plus the complete table of contents here.

It's fabulous! I especially love how they tie in the spinning portion of the curriculum with a study of simple machines. Lesson 3 (Felting) is available as a pdf online.

Wonderful for Waldorf homeschoolers.

Breaking Up a Beeswax Block

We are doing Candlemaking this week (ties in nicely with Michaelmas and Halloween and making jack o' lanterns). I've already done rolled candles with my students -- we do this on the first day of school every year and then burn the candles at lunchtime all year long. But we will dip candles on Monday, plan our jack o' lanterns Tuesday, make poured candles Wednesday, and finally carve the pumpkins on Thursday. I am looking through all my candlemaking stuff now. I have done this for years but you can always learn new things! For example, these directions suggest putting the block of beeswax in the freezer to make it more brittle before you hit it with a hammer to break it up into small pieces for melting. GREAT IDEA!

Always have a large quantity of baking soda readily available in the case of a wax fire and never melt the wax over direct heat. I put my wax chunks in an old Juicy Juice can and place the can in a pot of hot water which I set on the hot plate. When the wax is melted I move the can out of the pot of hot water and set it on an old towel on the counter and let the children dip their candles. Meanwhile, the second Juicy Juice can of wax chunks is warming in the water. When the can which is out of the heat cools off too much, I swap the cans and we keep going.

I also found a poem by Isabel Wyatt which I will read on Monday before we dip our candles. It's called "The Happy Candle" from The Way Down: Christmas Poems for Children of All Ages. Now out of print, you can still sometimes find used copies.

Fringe Loop Stitch Flower

This flower is recommended for faux fur (yuck) or ribbon (which I don't have on hand) so I tried a variegated yarn. I used Bernat Felting Natural Wool bulky (100% wool) in colorway Wild Flowers. Ha! It comes in 75 gram balls which will make lots of these flowers. I found that they were fun and easy to knit up -- and especially great for early knitters because you unravel part of the rows, which will help the children better see how a piece of knitting comes together. Also, the pattern is only 4 stitches wide so the children will feel success because they can quickly complete a row.

I found that the pattern didn't assemble well, because I used the wrong kind of yarn and the loops weren't stiff enough to look like a flower, and I think that had I used ribbon it would have been hard for the children to work with and confusing for them to sew so I am offering another option. I simply tied the two ends together as a bracelet! You can make a flower necklace to match. I calculate 20 rows (10 loops in your fringe) for a bracelet and 40 rows (20 loops in your fringe) for a necklace. Of course, the child could keep going and make it as long as they like. I think this is good, to give the students an easy pattern which they can use to explore their creativity. Maybe even try small ones in silver ribbon to be wreaths on a Christmas tree? Or I can see possibilities for using this technique to make a giant squid's tentacles... octopus... sea anemone... barnacle? Many creative knitters could probably do a lot with this.

Speaking of creative knitters, I found some other knitting and crochet books on Amazon when I was making the link to this one. I have Nicky Epstein's Knitted Flowersand I found when looking for the link that it's been re-released in paperback with a new cover


and that one knitter recommended a different book in her review, which she says is more complete and more inspiring: 100 Flowers to Knit & Crochet: A Collection of Beautiful Blooms for Embellishing Garments, Accessories, and More


Curious, I purchased it. Because Amazon tempts us all with their "Frequently Bought Together" options I fell into the deep pit they had dug for me and got an additional book. It's a crochet book and since I don't know how to crochet and need to learn, and these patterns are for small projects, and we are doing Number Shapes and Patterns as our Math block, I thought I would give it a try: Beyond-the-Square Crochet Motifs: 144 circles, hexagons, triangles, squares, and other unexpected shapes


I am looking forward to reading these new books in a few days!

Saturday, October 23, 2010

Twist Flower

I flagged six flower patterns from Nicky Epstein's Knitted Flowersthat only use the knit stitch:

Twist Flower - page 14
Fringe Loop Stitch Flower - page 32
Florets - page 48
Pop Daisy - page 76
Les Fleurs - page 84
Lazy Daisy Spiral - page 90


The first one I tried was the Twist Flower. It went quickly so I made it three times. Here are some suggestions. First, DON'T use a bulky yarn (5). You might think it will make the flower thick and lush (she used a Lion Brand Lion Suede yarn to knit hers) but it simply knits up too big for the pattern to be discernible. Second, DON'T use a variegated yarn (my second trial was a Sugar 'n' Cream cotton variegated yarn). The thinner yarn worked better for the pattern but the colors looked muddy and jumbled. The cotton also didn't have enough elasticity to be springy. It worked up stiff and you could see holes through the flower, which is a little disconcerting.

My third attempt worked better. I used a medium weight (4) alpaca/wool blend called Alpaca Love, colorway Lotus. This yarn was at my A.C. Moore, where I had a delightful shopping spree yesterday afternoon, but is also online for $3.49 a ball. One ball will make many flowers. The pattern is only 8 rows.

For fun, I tried making the center of the flower a contrasting color (once I made the outside petals with the Lotus color). I thought this would be nice since we can't make the bobbles that Nicki Epstein has in the center of her flowers (required the purl stitch). I used a lovely soft luxurious 100% organic cotton yarn - Lion's Brand Nature's Choice Organic Cotton in colorway Strawberry. (Here for $5.24 per ball.) This yarn is the same weight as the Alpaca Love, which is important, but it's a softer textured yarn which was lovely as the center. It only takes a tiny bit for those last few rows so you could use any contrasting color yarn that you like but keep it the medium weight. Cut your petal color and tie on your center color after completing row 5.

I liked this pattern because it was quick and fun, gave a good result, and gave the children practice in reading patterns (there's a part where you have to repeat the * directions to the end of the row). It also has you k2tog which is easy to learn.

I think this would be a good choice for after a scarf (which may or may not have had color changes in it, depending on the child) and before a more complex pattern like the Lamb.

Easy Knitting Patterns for Children

Looking through my collection of knitting books to find easy patterns. The students in my class who learned knitting with me last year are now ready to move beyond simply making scarves. When I taught myself to knit I did a scarf first and then a knitted cat pattern which was made in several pieces -- rather tricky to make and sew up. So I know the children would love to make stuffed animals but I need other options to give them.

Lamb

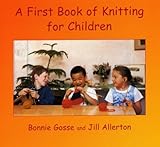
First up was the Lamb pattern in A First Book of Knitting for Childrenby Bonnie Gosse and Jill Allerton (page 44).


This is perfect! And I know it is widely used in Waldorf Schools (it's even mentioned in Zen And The Art Of Knitting: Exploring the Links Between Knitting, Spirituality, and Creativityduring her visit to a Waldorf school).


I purchased one 85 gram ball (which was the perfect amount of yarn for one lamb) -- Lion's Brand Alpine Wool 100% wool in colorway "Vanilla". It can be found easily at A.C. Moore or here's an online store which sells this yarn for $3.69 per ball, not a bad per-child price for a knitting project! I completed the pattern in an afternoon but left it not sewn up so that I can take it into the classroom, demonstrate sewing it up, and let the children see that it is a flat piece made entirely of rectangles and, therefore, something that they can achieve and which shouldn't intimidate them! It will, however, give them a chance to practice increases and decreases for the first time, casting off several stitches and then casting them on again later.

Next up is my trial run of the "Lion" pattern (which is slightly more difficult). I'm also exploring some flowers in Nicky Epstein's Knitted Flowerswhich are knit stitch only, to see if they are simple enough and/or if they turn out well with regular yarn (not something fluffy and fancy and difficult for children to knit with). I will post the results.


If the flowers are simpler than the stuffed animals we may do them first.... perhaps as gift tags on Christmas presents or decorations for the tree!