Thursday, July 9, 2009

The 12 Senses

It occurred to me that, since I had mentioned the twelve senses in a prior post, I should take some more time to explain this subject. There is a very nice basic write up of Steiner's 12 senses in Beyond the Rainbow Bridge : Nurturing our children from birth to seven. Of course, I don't have it with me so here are some links & other notes.


The Twelve Senses of the Human Being

Touch - the internal response to a contact with the outside world

Life - this sense is the internal feeling of well-being, of being alive

Movement - being inwardly aware of the way body parts move in relationship to each other

Balance - this sense orients us to the world with respect to up, down, right, and left

Smell - the sense that allows one to come in contact with the outside world via odors carried by the air

Taste - a deeper connection with the outside world in which flavors are directly sampled

Sight - the sense that takes in the exterior images of the outside world

Warmth - with this sense we are aware directly of the warmth of another body

Hearing - this sense can tell us more about the inner structure of an object than sight. When an object resonates, we learn about its deep structure from the sound we hear.

Speech - the sense of speech or word or tone - which is the hearing that involves meaningful words

Thought - this refers to the deeper sense of entering the being speaking through their words

Ego - this is the sense of ego or I which enables us to turn our thinking towards the being of another and to behold their I, their unique individuality directly


After presenting the twelve senses, Steiner explains that his intent is not to overturn the senses as understood by materialistic science, but to expand them.

[from The Riddle of Humanity: The Spiritual Background of Human History, page 86]

"As you know, I have never spoken of materialistic science without acknowledging its truth and its greatness. I have given lectures here that were for the express purpose of appreciating materialistic science fully. But, having appreciated it, one must deepen one's knowledge of materialistic science so lovingly that one can also hold up its shadow side with a loving hand. The materialistic science of today is just beginning to bring its thoughts about the senses into some kind of order of life, of movement and of balance from one another, and they have begun to treat the senses of warmth and touch separately. The other senses about which we have been speaking are not recognized by our externally-orientated, material science. And so I ask you to carefully distinguish the ability to be aware of another I from the ability you could call the consciousness oneself. With respect to this distinction, my deep love of material science forces me to make an observation, for a deep love material science also enables one to see what is going on: today's material science is afflicted with stupidity. It turns stupid when it tries to describe what happens when someone uses his ego sense. Our material science would have us believe that when one person meets another he unconsciously deduces from the other's gestures, facial expressions, and the like, that there is another I present - that the awareness of another I is really the subconscious deduction. This is utter nonsense! In truth, when we meet someone and perceive their I we perceive it just as directly as we perceive a colour. It really is thick-headed to believe that the presence of another I is deduced from bodily perception, for this obscures the truth that humans have a special, higher sense for perceiving the I of another."


This book is not available for sale at SteinerBooks or any other location I could find; however, you can read it online for free at the Rudolf Steiner Archive.


Here also is an interesting article by Jeff Green called "Sensing the World and Ourselves".

Making Goat Yogurt

So, I was talking to Seana about making goat cheese today and telling her that while my children love goat yogurt and goat cheese, they HATE goat milk. I have several cans of it at the house and don't know what to do with them. She gave me directions on how to make goat yogurt and so I am putting them here:

take a two quart glass jar with lid and fill it 3/4 of the way with cold goat milk. add 1/2 of a small container of store bought plain goat yogurt as a starter. set the milk and starter in a small cooler (she said 6-pack size cooler) filled with warm water. close the cooler and place it on the kitchen counter. in one hour, take out the warm water and replace it with fresh warm water (since the goat milk will have cooled it off) and then close it again and put it back on the counter and leave it overnight. in the morning, you will have made goat yogurt!


This morning we put the finishing touches on the hairstyles for our doll heads, added eyebrows, cut the hole in the neck for the dowel and glued in the dowel, felted the hands, and went shopping for fabrics. We had a total blast in the fabric store! Imagine -- if you can -- a group of women with doll heads of various hair colors, eye colors, and ethnicities all excitedly trying to choose the perfect fabrics for the costume of their puppets. We needed 1/2 yard for the main body of the doll, plus accessories (such as a cloak, lace collar, apron, or bonnet) and a piece of fabric to swaddle the baby in. I chose a lovely textured 100% linen piece in white for the swaddling cloth. Several others found a delicious 100% bamboo fabric which was very flannel-like and cuddly. My doll has a lavender, plum, and bronze print fabric and I got a piece of celery 100% silk fabric to be a bonnet. We had a fun time chattering and searching and advising one another! Several people found buttons which made lovely accents -- one ornate button is being used as a brooch, one flower button is being used as a hair accent. The staff was very friendly and helpful (and patient!) and the shop is right next door to a knitting cafe, where you eat and knit and chat. We plan to go back to both, to the fabric store to show off our completed puppets to the interested staff and to the knitting cafe to have a look round and eat a little something.

After lunch we sewed the main body onto the doll and added the first hand with the loop of elastic (hidden inside the body of the doll for the puppeteer to manipulate). This took quite a bit of time! It is lovely to see them all come into being, though, especially considering that each of us began with exactly the same pile of raw materials (white batting, a felting needle, a large sponge to use as a felting base, and a pile of roving in eye, mouth, and hair colors). They are VERY different! After classtime, we all went together to the Boulder Dushanbe Teahouse which was spectacular. It was actually constructed in Tajikistan, taken apart piece by piece, shipped over to Boulder, and reassembled. The intricate hand carvings are amazing. My personal thought is that it would be a perfect place for a wedding reception. Not that I'm going to be having one any time soon, but it was the first thing that popped into my head.

I have other assorted notes from today.

Here are some book recommendations that came up today while the group was talking:


Another tip that I got was from a parent whose child attended the Tara Performing Arts High School here in Boulder. She said that when they do their end of year play, the children all needle felt small figures which are then sold at intermission. It is a fund raiser as well as a souvenir for parents and other family members. For example, when they did "The Sound of Music", the children all felted goats. This doubled as an activity for children to do when it was not their turn at rehearsal. Baskets of supplies and examples of the finished project were provided, and this kept little hands busy. Actually, I say little hands but we are talking high school students here! However, I think this is a terrific idea and one we can use at Tidewater. Each winter the students put on a performance of the Nutcracker and we could all make white wool Snow Fairies.

We all discussed how much we love Living Crafts magazine, a publication to which Suzanne regularly contributes, and one I highly recommend. The projects are of a very good quality and variety, the directions are clear, the lists of Waldorf vendors are handy, and the magazine doesn't come frequently enough that I get overwhelmed -- which is important to me! While we were talking, one person shared a craft idea that I really liked. She said that her friend (who is also a teacher) asks the parents of each child to go to a thrift store and purchase a large pure wool sweater, which the students then felt in the washing machine. The arms are cut off (and the teacher does basket stitch around the raw edge) and the children decorate their new vests with buttons and pockets. We were saying that this can double as a project which parents can begin at a back to school or parent/child night and then the children can complete. It helps people feel a part of the community, gives a good opening for the teacher to begin a conversation about the importance of warmth, it's a project which is simple enough for adults and children to share, and the children then keep their vests in their cubbies all year long. At this school, it is done as their first craft project of the year. I thought it was a great idea.

Also speaking of craft ideas, I asked Suzanne what silks she thought people should buy to be a backdrop (on their laps) for puppetry if they are just starting out and can't afford a large collection. She said silks in seasonal colors (so you could buy one every few months which represents the colors of the season you are currently in) and a rainbow silk is a good all-purpose silk. I asked her about a nighttime silk, like the blue one with gold stars that is often sold in Waldorf catalogues. Her response is that she has one and uses it occasionally but that she has a blue silk which she sewed sequins onto to be a night sky. This is softer than the harsh machine-printed pattern. Then we began to discuss Nuno felting (wet felting wool onto silk gauze) and how this opens up new possibilities for storytelling settings. I mentioned that you can do this same technique on cheesecloth if you can't afford silk gauze and so that is also a possibility for a beginning storyteller.

Here's a tutorial on How to Make Nuno Felt.


Wednesday, July 8, 2009

Knitted Tote Bag Pattern

So, here I am in Boulder, having made it safely to the Boulder Waldorf Kindergarten. Today was our first day of class with Suzanne. We spent the morning discussing the archetype of the mother, the sense of touch and how it relates to the incarnating child, how the absence of loving touch in the first days, weeks, and months of life can interfere with the children finding themselves in their skin and having the confidence and security which comes from knowing those boundaries, and how that ties in to the sense of Ego (the 1st sense is connected to the 12th sense) and the ability to have healthy Ego to Ego relationships with others as an adult. We learned how it is so therapeutic for children to watch the archetype of the Mother rod puppet as she so gently touches and holds the baby (they are specially designed to hold the baby close) and strokes it, how this can help heal this need for loving touch in children who may have missed it, and how it imprints on the child. A puppet has been filled with soul by the storyteller but doesn't have the Ego so the child is able to meet it more easily -- there is no bumping of Ego on Ego -- and absorb it more fully. We also learned about the spectrum of skin transparency (from thick skin to thin skin with normal in the middle), the three hearts (as storyteller Nancy Mellon has termed them) that you tap into when you tell a story, and how to set up the story scene, reach all three of the hearts, tell the story, and close the story and put away the story scene. We also practiced with the Mother rod puppets, how to wear them, how to move them in certain gestures, and how to make each movement with the puppet's whole body. If you are opening your arms and saying "Welcome, children" but not doing anything with the rest of the body, the puppet will seem expressionless. We learned how to hold the puppet upright so that it really connects the earth and the universe, how if you hold your puppet askew the children will feel that their world is somehow askew. We also had to practice sitting up straight. Between that and manipulating my fingers and wrist to control the puppet, I was very tired by the end of the morning! It was exhausting work.

After lunch we began felting the head of our Mother rod puppet. Mine has blue-green eyes and copper colored hair which she wears in waves around her face and lets hang down long in back. I took pictures of each step in the process of making the head (having bought a new digital camera today -- I couldn't find mine before I left) and I will share them once I figure out how to get them off my camera. I will also take pictures of the toddler and kindy rooms here at the school, as well as the lovely grounds. They have goats! The fridge has goat milk in it which they are going to make into cheese. I promise I will document as best I can because I know that homeschoolers always want to know what a real Waldorf school looks like and what goes on there!

The Rhythm and Tasks for Assistant Teacher is posted on the wall of the toddler room. Here are some notes from it:

fill water pitcher (in addition to having water at all times in the classroom, the children all have their Sigg water bottles on the picnic table and there's a water cooler outside on the playground in the shade)

make chamomile tea (2-3 teabags, 1 spoonful of honey)

the grain of the day is cooked in the rice cooker in the classroom

  • 1 cup feeds 4 children + 1 adult

  • generally cook 3 cup + 1/4 cup red lentils and 1 bouillon cube

  • all grains 2x water EXCEPT barley 3x water

  • Monday - barley

  • Tuesday - rice

  • Wednesday - millet + oatmeal (in 2nd rice cooker in kitchen)

  • Thursday - quinoa + rice (in 2nd rice cooker in kitchen)

  • Friday - barley


8:20 am faculty verse in kitchen (I'm very curious about this, I wonder what verse they use -- maybe In the Light of a Child: A journey through the 52 weeks of the year by Michael Hedley Burton??? I don't know. That's what I would use if it was me, for what that's worth. I love the idea of the adults gathering to do a verse and begin the day in that very intentional way. I wonder if I can do that in my classroom with my aide?)

gather fruit or veggies for chopping into grain

if bread day, begin yeast rising in warm water with honey

chop veggies or fruit, offer nibbles to children

steam the vegetables

9:25 season grain, mix in cooked veggies, flax oil, olive oil, Braggs, and nutritional yeast

9:35 gather for circle time and finger plays

9:45 first snack, one teacher sings while setting table, one teacher is washing children's hands

10:15 tidy from snack

11:30 second snack


Nice that they have two snacks! I know that outside all children are required to wear appropriate hats in the summer and in the winter, and that parents are asked to have their children wear hats even if they play there after school hours, so that it is consistent for the children. Also, they use unbleached cotton string grocery bags for each child's "extra clothing bag" which I think is a very nice idea and I may have us do at Tidewater. They are all organized, labeled, and hanging on hooks in the coatroom. We had extra clothes for my students for paint/water/mud/etc. emergencies and they were in ziploc bags in a big bin which was a pain in the neck to sort through everytime you needed clothes for someone. It was also hard to remember to ask parents to send in different clothing when the seasons changed.

Anyway, I began this post with the intention of talking about knitting! I went to a terrific yarn store today (and walked out about $340 poorer) because I want a knitting project for this trip. I plan to knit and then felt a tote bag and then needle felt a picture or design onto it which helps represent this trip for me. Then I will always remember this vacation! I got a ton of yarn (some for the project and some extra just because it was too beautiful to pass by), some circular needles, and then got home and couldn't figure out what to do! The last time I knitted a tote it was on straight needles and then I sewed up the sides. But in order to make the stripes match, you have to count rows and I don't feel like doing that. Thus the circular needles. But I couldn't figure out how to start -- is it like a hat, where you make it small and then get bigger, do you start at the top by casting on many rows and then make it small at the bottom, when do you make the cord and how do you attach it and do I want a drawstring handle or just a regular handle, etc? I found this pattern online and although I'm going to completely ignore her design and do stripes with my beautiful new yarns, I do appreciate her insight that I can just cast on 132 stitches and knit to my little heart's content, then cast off. This gives me a big stocking tube which I then seam at the bottom. If I change my mind and want a tote that will sit flat on the floor, I can get directions for that part later. Also, I believe that I can add the handle later. So I am going to just get on with it! (And if I find out at the end that I should have been more organized, I will post what went wrong -- like it was impossible to add the handle or something -- and you can all learn from my mistakes! But I'm assuming that with stripes the top and the bottom are interchangeable until you finish it so I should have some flexibility remaining with the handle situation.)

Here's my "design" plan. I guess the Plan should be in quotation marks too! :-) This is to help me remember the yarn layout I planned in the store, but I won't take the time to find all the links to all the yarns online. You can email me if you really are curious about one!

a Norwegian yarn which is a lovely deep sea blue (for the bottom of the tote bag, since I know it will get placed on the ground)

an Australian yarn which is variegated deep sea blue, forest green, citrus green, and sunset colors

a yarn from the Shetland Islands which is chartreuse

the Australian yarn again, this time in baby blue, lavender, rose, and the sunset colors

a hand-painted yarn from Montana called "Canyon" which is lavender, rose, peach, and baby blue

the Shetland yarn again in Lipstick which is a strong pink and will finish off the top -- I plan to do some kind of fancy stitch here, maybe a scallop thing, although that might mean I have to put in the handle first, so who knows. I really want Nicky Epstein's book Knitting On the Edge and maybe Knitting Over the Edge... I really like her work.

And yes, I also bought a knitting book while I was at the yarn store (I couldn't resist just one) called Fiber Gathering: Knit, crochet, spin, and dye more than 25 projects inspired by America's festivals. It gives great info on the fiber festivals throughout the country (including MD sheep and wool) and patterns too!


Friday, July 3, 2009

4th of July

Today is my last day with the girls before I leave on my trip, so we are going all-out on Family Time. This morning we went to the Games at the Community House, where Leah got 3rd place in the egg and spoon race and Leah and Rebecca got 2nd place as a team in the egg toss. We arrived late so the girls missed the three-legged race, back-to-back race, and the sack race. We also never captured a box turtle this year so we didn't have a competitor in the turtle race. The girls had a good time and we ran into some of my friends from when I was growing up in the Cliffs and we got invited to a barbeque at 5 pm. The Square Dance is at 7 pm.

While we were in the Cliffs, the children and I went to the little cabin where we vacationed last year and rescued our bikes and trike from the basement. The boiler in that house exploded and so it looks like Natalie's bike didn't survive the disaster. Apparently, the water wasn't discovered for several weeks. That's the problem with a family-owned summer cabin. When no one is using it, no one notices when things break. My brother and sister-in-law and 3 nephews were there (and Natalie and Joe were a team for the egg toss but didn't get to the final three) and I discovered that they are moving to Australia next year! First thing I thought was, whoa, that's pretty far away. Looks like a family tie that will be hard to maintain. The second thing I thought was, hey, we have people we can visit in Australia!

While I was loading bikes and the trike into the back of the truck, the girls discovered that the local wild red raspberries were ripe (these are also known as wineberries). They filled Natalie's hat with them. Unfortunately, this was Natalie's new sky blue hat with white polka dots and it now had a big red berry juice stain on it! When we got home, I found that our next door neighbor had gone berry picking and she brought over a big container of raspberries for the girls and I to enjoy. That was very sweet of her.

The girls are having lunch (hot dogs, bread and butter pickles, baby carrots, tomato soup, milk) and then naps while I work on getting all the laundry done before I go. Having decided to strip all the beds and put clean sheets on them, wash all the towels and the blankets, and do a ton of cooking as we work to use up the perishable things in the house (this morning we had crumpets with strawberry-rhubarb jam, greek yogurt with sliced strawberries, and orange juice), I now have tremendous piles of both laundry and dishes. Add to that the barbeque and square dance and I can guarantee that I'll be up into late in the night cleaning. The girls go back to their dad's house at 9 am tomorrow morning. Then I have to pack the truck, back up my hard drive, and take the dog and my remaining perishable items to my mom's house, and hit the road. Hopefully I'll be well past D.C. before the traffic for the national fireworks begins to clog the roadways. I am taking my laptop with me so I will be able to keep blogging about my trip.
It strikes me as somewhat funny that I am leaving for my road trip on Independence Day.

Happy 4th of July everybody!

Thursday, July 2, 2009

Boats

Summer Camp plans for the trip to the Calvert Marine Museum:


Booklist:


Wednesday – introduce topic

Today we are going to look at surface tension and buoyancy. What makes things float? This is in preparation for a field trip to the Calvert Marine Museum on Friday which has indoor and outdoor collections of historic boats. In addition, there is a boat shed where the boat restorations and building of historic replicas take place -- you can visit the boat shed and speak to the woodworkers.

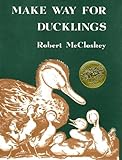
Begin by reading Make Way for Ducklingsby Robert McCloskey. What helps the ducklings stay afloat (they are paddling with their feet). Ask the children many of them know how to swim or stay afloat. How do you do it? Now, how does a boat stay afloat?


Science Experiment 1:

Do the “Make a Paperclip Float” activity. Have the children use paper to record the results of their experiments.


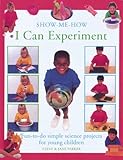
Read Time of Wonderby Robert McCloskey. Ask the children how many of them have experienced a severe rainstorm or hurricane. Explain that sometimes severe storms can cause boats to capsize and sink. This happens when the boats fill with water (see the explanation “Weight, Shape and Water” on page 35 of Show Me How I Can Experiment (Show Me How I Can)by Steve Parker).


Science Experiment 2:

Do the “Sink or Swim” activity on pages 34-35 of I Can Experiment. Ask the children to make predictions before testing each object, then record their findings on a sheet:

“Sink”

“Float”


Discuss the explanation “Floating Forces” on page 34 of I Can Experiment.


Additional Surface Tension Experiments


Thursday – explore topic
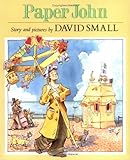
Read Paper Johnby David Small. Let the children try to make their own paper boats (which will actually float!)

Activity: “Folding a Paper Boat”

After a while, your paper boat will no longer float. Why is that? Ask the children if they can come up with some theories (using what they learned in previous experiments) as to what makes the boat sink.

When you visit the Calvert Marine Museum, it will be either high or low tide when you first get there. Explain to the children that the tides will change and that you can visit the Marsh Walk twice (once before the Tennison cruise, once after). By visiting twice, you will see different things. At high tide, water covers most of the mud flats at the marsh and you see ducks, crabs, or jellyfish swimming. At low tide, the water is much shallower and mud is exposed. In this mud you can see evidence of fiddler crab burrows and even the giant claw of a fiddler crab or two. Great blue herons, raccoons, and river otters also visit the marsh to hunt for their dinner and you may see evidence of their footprints in the mud.

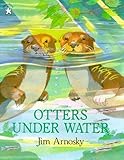
Read Otters under Waterby Jim Arnosky.

Regardless of what time of day you do the marsh walk, you’ll want to have your underwater viewfinders with you. This will help you get a close-up view of the animals’ underwater world.

Activity: Have each child make an “Underwater Scope” to take on the field trip. If you end up with extra time, the children can put some of the objects used in their experiments in a bowl of water and practice using their scopes to magnify them.


Friday – make field trip journals

While waiting for the field trip, read The Lighthouse Catby Sue Stainton. You’ll definitely want to take a tour of the Drum Point Lighthouse when you are at the museum! Be sure to stop and watch the video in the front lobby when you first arrive. It gives an overview of the museum and shows exactly how they moved the lighthouse from its original location at Drum Point (this involved working through the night with blowtorches and borrowing a giant crane to lift the lighthouse).

Ask the children to use construction paper and crayons to draw a lighthouse of their own design (the cover of their field trip journals). Have each child write his/her name on the back of the artwork. Fold and hole punch 8 ½ x 11 white paper, punch artwork to match. Tie ribbons through holes. Have each child write the name of the field trip destination, the date, and his/her age on Page 1 of the journal. Have each child write a prediction of what he/she expects to see and do on the field trip on Page 2. Take the journals and a pencil for each child so that he/she can take notes on the field trip.


Materials List

Lined paper for each child to record results of science experiments
Pencils
Clean dry paperclips
Tissue paper
A bowl of water
Pencil with eraser
Baby powder
Dish detergent
Cardstock
Bamboo skewers
Plastic cups
Tape
Household items such a cork, pumice stone, pebble, small sieve, metal dish, clothespin, dry sponge, wooden spoon, metal spoon, nail, ping pong ball, etc.
Several rolls of pennies
Quarter
3 or 4 medicine droppers
Several dinner glasses
Water
8 ½ x 11 white paper
Empty plastic containers with lids (such as yogurt containers) – 1 for each child
Scissors
Plastic wrap
Construction paper
Crayons
3 hole punch
8 ½ x 11 inch white paper
Ribbon in various colors
Pencils

Water

Summer Camp plans for the field trip to Flag Ponds Nature Park:


Booklist:


Wednesday – introduce topic

Introduce this week’s topic (water – today’s focus will be on ecosystems) by reading Fish Is Fish by Leo Lionni. Discuss with the class that animals need water to survive and talk about some of the different ways that animals use water. Make a list on a large piece of chart paper:

“How Animals Need Water to Survive”


Next, tell the children that you’ll be reading a story about an animal that lives in the water and you’ll be asking them to listen as you read so you can list the animals that HE ate and the animals that tried to eat HIM. As you read the story, let the children call out when they hear animals for the 2 lists and make the lists as you go along. Use another piece of chart paper. Read The Tale of Mr. Jeremy Fisher by Beatrix Potter.

“Animals that Frogs Eat”

“Animals that Eat Frogs”


Use your lists to make a food chain on a 3rd piece of chart paper, with the tiniest prey at the bottom and the biggest predators at the top. Then talk about how even the fiercest predator wouldn’t be able to survive without water. It is their habitat. Water seems like such a simple thing but we all depend on it!


Science Experiment:

Frogs are vulnerable to other threats besides being eaten. Water pollution is especially damaging to frogs. Do experiments 1 and 2 from “Frogs Tell Us Our Environment is Healthy”. Because salamanders, like frogs, are amphibians who also lay soft jelly-like eggs in water and have moist permeable skin, they are bio-indicators. Flag Ponds has a program where volunteers catch and count the number of salamanders each year. If the salamander population goes down, what might that indicate?


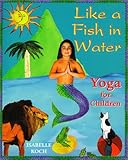
If there is extra time, have students do the Frog Pose (pp.18-19) and Fish Pose (pp.36-37) from Like a Fish in Water: Yoga for Childrenby Isabelle Koch.


Thursday – explore topic

Before students come in today, fill an ice cube tray with water combined with food coloring and stick it in the freezer for later.

Today’s focus will be on the fact that, since water is important for all life, that means us too! Begin by reading The Legend of the Bluebonnetby Tomie de Paola. Ask students to list (again, use chart paper to record their suggestions) ways in which humans rely on water. Don’t forget to include the fact that we are at the top of the food chain; as predators, we need each of the plants and animals below us to survive or we’ll have nothing to eat. As they need water, so too do we need water. And remind the students that we need water to be clean so that the plants and animals we rely on don’t get sick.


Science Experiment:

Do the activity from “Hold Water Upside Down!” (pp. 32-33 of Show Me How I Can Experiment (Show Me How I Can)by Steve Parker). This is a very wet, very messy experiment so do it over a large plastic bin! Make sure you have plenty of the thick, smooth, shiny, flat cardstock so that each child can have a turn.


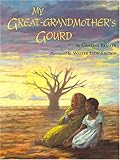
Read My Great Grandmother's Gourdby Cristina Kessler. What lesson did the people of the town learn? What modern conveniences do we have that you take for granted? What would you do if they were suddenly gone? Depending on how much time the students took on the preceding science experiment, you may have time to do both the science experiment and the art project below OR you may choose to do just one.


Science Experiment:

Talk about the water cycle (water on the ground evaporates up into the sky when warmed by the sun, as clouds grow heavier and heavier with water it begins to fall as rain, some rain soaks in the ground while some moves to rivers, ponds, etc. where it is then warmed by the sun and evaporates again). Use a piece of chart paper to diagram it. Then ask students if they have watched ice (solid form of water) melt (turning to liquid form) and evaporate as steam (turning to gas form). Most students should have already seen this before. Now ask them to try a science experiment with you. If you make ice cubes with color in them – which you did this morning – and put the ice cubes in a pan and turn on the heat under it, will the color go up into the air when the water turns to steam or will the color stay in the pan? Ask students to make a prediction, then go to the kitchen area to try it out!


Art Project:

Make Your Own Rain Stick


Friday – make field trip journals

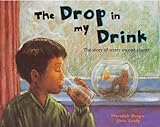
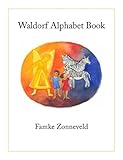
While waiting for the field trip, read The Drop in My Drink: The Story of Water on Our Planetby Meredith Hooper. Then have the children each decorate a sheet of construction paper to be the cover of their field trip journals. They have two choices. One option is to look at a glass of water and think about all the places that those drops of water have been, then draw a picture. The other choice is to illustrate a word for water in the shape of the first letter of that word (for example, to illustrate “R is for River”, have the river make the shape of the letter R – see below). Some more examples are S is for Stream and W is for Wave. You can even get the whole class in on the idea of creating a Water ABCs where you think of a “water word” for each letter of the alphabet!

Have each child write his/her name on the back of the artwork. Fold and hole punch 8 ½ x 11 white paper, punch artwork to match. Tie ribbons through holes. Have each child write the name of the field trip destination, the date, and his/her age on Page 1 of the journal. Have each child write a prediction of what he/she expects to see and do on the field trip on Page 2. Take the journals and a pencil for each child so that he/she can take notes on the field trip.


from The Waldorf Alphabet Book


Materials List

Ten pieces of large chart paper
Marker
Hard boiled chicken egg
Green jelly
Container of water
Piece of leather
Coffee filter
Coke
Ice cube tray
LARGE plastic bin
Large bowl of water
Food coloring
Plastic tumbler
Pencil
Scissors
Thick, smooth, shiny, flat cardstock
Ice cubes made with water and food coloring
Pot
Heat source
Cardboard tube (one for each child if possible, or the children can work in teams)
Box of 1-inch long nails
Marker
Masking or packing tape
Paper
Rice and/or small beans (uncooked)
Construction paper
Crayons
A glass of water
3 hole punch
8 ½ x 11 inch white paper
Ribbon in various colors
Pencils