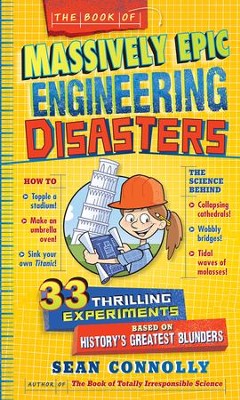
The Book of Massively Epic Engineering Disasters:
33 Thrilling Experiments Based on History's Greatest Blunders
by Sean Connolly
I wrote a blog post previously with my planning notes when doing this block on Zoom. Now I get to do it IRL with a group of students!
For each disaster I'll share my up-to-date notes and some photos. Today we learned about the Great Molasses Flood in Boston in 1919.
- recall last week's disaster (The Titanic) and revisit density (m/v)
- look at illustration of the ship's bulkheads in The Book of Massively Epic Engineering Disasters, p.64, and see that they weren't sealed at the top
- discuss the 47TH ANNUAL GREAT CARDBOARD BOAT REGATTA (next Saturday at 1 pm at Campus Lake) and hear about one student's design
- pass out Density Cubes giving one cube to each child, have students arrange themselves in a line of lightest to heaviest cube without speaking, then use a balance to measure the mass and see if they are correct
- read "The Boston Molasses Flood" information from The Book of Massively Epic Engineering Disasters, pp. 75-79
- set up a container of molasses for the children to feel
- look at the illustrations in The Great Molasses Flood by Beth Wagner Brust
- do experiment #12 "Holding Up to Pressure"
-
for each team (set up three):
empty 2L plastic soda bottle with a hole in it
gallon jug of water
Make the holes in advance using a sharp knife. Make sure the holes are all round (don't cut a slit) and that they are the same size. One bottle should have a hole approx. 2 inches down from the top. One bottle should have a hole approx. halfway down. One bottle should have a hole approx. 1 inch from the bottom. The caps must be off the bottles for this experiment to work. The children work in teams of two to fill the bottles (one child with his/her thumb over the hole, one child pouring). It works best to place the bottles in their location first and then fill them. They are very hard to carry. Arrange the three bottles along the edge of a paved road with their holes facing the street. Make sure everyone is ready before you release the water.
This experiment was not as dramatic as you might think but it is fun. We tried it twice but didn't really see a big difference between the three bottles, so our data table on the chalkboard stayed empty.
- do experiment #13 "Slow As Molasses?"
- for each child:
tube of the cheapest toothpaste you can find
This experiment is also a boatload of fun (and works best outdoors).
Pro Tip: Really go for it. Jump on it with both feet!
Experiment Idea: One student remarked to me that it would be interesting to put the toothpaste cap on lightly and try this, and see if it would pop off just like the rivets on the molasses tank did. I agree... that would be cool.
Side Note: We found it extremely hilarious that the cheaptest toothpaste brand I could find was called Aim.
- for more fun with non-Newtonian fluids, we made Oobleck
-
for each team (set up three):
sensory bin or large container
box of cornstarch
gallon jug of water
measuring cup
Since all of my students have made Oobleck before, I tried to introduce some new explorations that would make it fun for them.
I asked them, is Oobleck 2 parts cornstarch to 1 part water, or 2 parts water to 1 part cornstarch? How will you know if you have made Oobleck? (Answer: Your mixture is Oobleck if it becomes a solid when you apply pressure but becomes a liquid when the pressure is released.)
I also presented them with a "Race-bleck" challenge using an old drain board tray. Can you form a ball of Oobleck that is hard enough that it will roll down the ramp... or will it turn into a liquid before it reaches the end?
They had a fantastic time! We did not do our usual routine of having each child draw and write notes about his/her favorite experiment or about the disaster itself at the end of the session, because their Oobleck experiments took up all of our remaining Science Club time. As I knew they would!
Fabulous explorations of Oobleck that stood out today including throwing it into the air and watching it soften and then observing that it turns back into a solid when you catch it, and letting the Oobleck drip from your fingers and noticing that the force of the wind turns the drips into a solid mid-air.
This post contains affiliate links to materials I truly use for homeschooling. Qualifying purchases provide me with revenue. Thank you for your support!


 Immersive Experience
 Immersive Experience


No comments:
Post a Comment