Thursday, October 31, 2019

Ooey-Gooey Sensory Play for Halloween

This year Halloween fell on a Thursday. We led up to it all week in our Early Childhood class with stories, verses, and plenty of ooey-gooey sensory fun!

We continued with our Songs, Verses & Movement for classroom routines.


Circle Time


Monday, October 28

The Witch's Brew activity was the definite hit of this morning! Lots of the older children wanted to do this too and joined right in. I didn't grab pencil and paper fast enough to catch all of the "ingredients," but I did my best. And, wow, the creativity was flying thick and fast. Who knew that a bright red autumn leaf was actually a salmander burp?

To the hollowed out pumpkin, they added water and...

    scales of lizard tongue
    a salamander burp
    the eye of the ancient frog
    the touch of a goblin's toenail
    vampire fang
    ogre's eyes
    broccoli Skittles
    dragon's tear
    silver flowers
    ancient beehive
    bark of a crystal tree
    spider skin
    the bow from a witch's hair
    fairy powder


After all of the children had added things and stirred and stirred to their hearts' delight, we put in the two secret ingredients (a container of vinegar/water and a container of baking soda). It bubbled and fizzed in a most satisfactory way.


Tuesday, October 29

I didn't dye the cooked spaghetti black for our Halloween Sensory Bin; I simply used whole wheat spaghetti. Easier!

Also easy were our coffee can lanterns. Thank you, Ms. Shelby, for giving me a tip on these. Fill the coffee cans with water and leave them in the freezer overnight to freeze solid. It is much easier for the children to hammer through the metal walls of the coffee can without it bending while they are doing so. I used a finish hammer (lightweight) and a roofing nail (large head) and placed the coffee can on a towel while they were working on these one at a time. Add a few holes near the top for stringing the twine through. Set it out overnight for the water to thaw and, voila! A sturdy candle-ready lantern. "The Autumn Blanket" was the perfect gentle story to lead us into a discussion of the Lantern Walk and its celebration of light in the darkness.

The weather is starting to get colder so instead of spending a whole hour outside we came in early from recess and had a bonus story, Georgie.


Thursday, October 31

Children who hadn't make lanterns did their hammering work today. Sensory bins once again reigned supreme. And, of course, we made Stone Soup!

Thank you to everyone who contributed to our Stone Soup. We had mushroom stock, shallots, carrots, broccoli, sweet potato, tomato, and zucchini. We also had Halloween cupcakes brought in by a family. Delicious!


Our community Lantern Walk (co-hosted by Trisha Revelle of Tinkergarten and myself) will be Sunday, November 3rd at 5 pm at Campus Lake Trail, with an optional Lantern Making Workshop beforehand at 4 pm at the DFC.

The songs we are learning for this special event are both from the book & CD The Singing Year by Candy Verney.

    "I Go With My Bright Little Lantern," track 73

    "Glimmer, Lantern, Glimmer," track 74

Tinkergarten has pvoided a handout with words to the Martinmas Song (slightly revised) "I Go Outside With My Lantern" to their families as well. The sheet music and words for "Glimmer, Lantern, Glimmer" may also be found in Festivals Family and Food: Guide to Seasonal Celebration, p.107.


This post contains affiliate links to materials I truly use for homeschooling. Qualifying purchases provide me with revenue. Thank you for your support!

Sunday, October 27, 2019

Making a New Sentence Analysis Material: How

This post will make the most sense if you read the two before it:


A HUGE thank you to Don Morris, Aviation Technologies Professor at SIU, and well-known for Intricate wooden laser cut engine kits with functional gears, pistons, valves and cams (article from Geeky Gadgets) for this donation!


I can't believe these pieces are considered scraps!


lots of little pieces left to sort!


Since we were so fortunate in receiving this large donation of wooden pieces last week, I'm able to handmake the Montessori Sentence Analysis material and make it just the way I want it, simply dyeing the appropriate shapes the appropriate colors! The questions are written on the classroom charts and on each child's personal charts, so I'm not actually writing the questions on any of the arrows. I did dye more pieces than we needed, just to have them, but the bare minimum needed to accompany the Mandala material is

    black (Noun color):
    one large circle, one medium circle, one small circle, three arrows

    red (Verb color):
    one large circle

    blue (medium blue, Adjective color):
    three triangles, three arrows

    orange (Adverb color):
    four small circles, four arrows


stencil showing the Sentence Analysis shapes


all we need are arrows, circles, and triangles


Dyeing Instructions

I followed the directions in How to Make Brightly Colored Food-Safe Wood Stain. For just a few pieces (3 or 4), a snack size ziploc baggie is fine. For larger quantities I used a quart sized bag. I did not increase the quantity of the dye recipe when I upped the bag to quart size, since even a tablespoon of dye is extremely strong.

I found that the liquid food coloring was easier (except for the black) since it dissolves right away into the warm water. For the black with liquid food coloring, you either need to dye pink and then overdye black (since black liquid food coloring tends towards the green) or use the gel. If using the gel, you need to zip the bag shut, massage the gel into the warm water until dissolved, and then open the bag and add your pieces. It is a bit of a pain, but it does save time over dyeing once and then overdyeing.

For the liquid food coloring, I used McCormick and for the gel food coloring I used Tylina Sweetshop Black Gel, 0.7 oz. I got the McCormick at the grocery store and the Sweetshop at Party City.


For either kind of coloring, I placed the pieces in the bag, massaged the color onto both sides of each pieces, laid down the bag so that the liquid was all around them, and then started the timer. I flipped the bag over several times while it was dyeing, and would massage the color (through the baggie walls) on the pieces when I did it. Using a pair of plastic tweezers to take the pieces out saves your fingertips from being dyed. And I just placed them on a cookie drying rack placed over a folded towel to air-dry.

This was surprisingly easy and each batch actually took only a few minutes!


Black Recipe
liquid food coloring

    5 drops red, 1 T warm water, 3 minutes

    allow to dry, then overdye with

    5 drops black, 1 T warm water, 6 minutes


Black Recipe
gel food coloring

    9 drops black, 1 T warm water, 10 minutes


Red Recipe
liquid food coloring

    10 drops red, 1 T warm water, 5 minutes


Medium Blue Recipe
liquid food coloring

    8 drops dark blue, 1 T warm water, 10 minutes


Orange Recipe
liquid food coloring

    2 drops yellow, 3 drops red, 1 T warm water, 3 minutes


make sure your pieces will fit in your ziploc bag


mix color & water, add pieces, and let sit
these are orange Adverb circles


dividing up the large Verb circles into two bags of dye
to make sure they get really red


medium-blue for the Adjective triangles


make sure the pieces are spread out in one layer


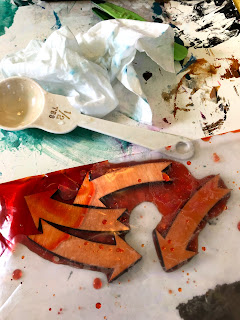
overdyeing pink with black
having a base color counteracts any tendency towards greenish black


success!
the first day's batch is done


the large Subject circles


experimenting with gel food coloring for the black


it makes a nice strong color
these are Direct Object and Indirect Object


always make sure the liquid covers the pieces


the second day's batch is done


project complete!


This post contains affiliate links to materials I truly use for homeschooling. Qualifying purchases provide me with revenue. Thank you for your support!

Making a New Sentence Analysis Material: Why

I'm usually no fan of DIY Montessori -- and have spoken out quite strongly against it many times -- but this weekend I find myself in the position of making a classroom material! And I'm actually having a great deal of fun.

There are arguments for making your own materials as well as against.

Of course, when you have your Montessori teacher training, they give you blackline masters to make quite a lot of material (like the Landforms & Water Features three part cards, the Who Am I? Animal Stories/Riddles, and so on). And in some teacher training programs, instead of buying your binders, you watch actual lesson presentations, take detailed notes, and then write your own binders. I know people who hand-drew and hand-colored their wall charts for The Timeline of Life and The Timeline of Early Humans!

However, I do not agree with handmaking any of the Math materials since they have to be machined quite precisely to be accurate, and any inaccuracy would confuse the concepts (10 unit beads equaling a 10 bar, for example). And I think that things like the Puzzle Maps are best left to the professionals.

In theory, however, you can most certainly use the Montessori method without buying any of the official materials. It is a concept, not a shopping list. The idea of having the hands-on material and letting the children learn independently through manipulation of it is one. (Note: The way of manipulating it you teach them beforehand... it's NOT a free for all).

Here is an example. Here's the Thermic Bottles official classroom material (this is used in Early Childhood, ages 3-6, as a Sensorial material) and a Thermic Bottles how-to blog post from Carrots are Orange. Check it out and you can see that, while having the exact material would be nice, you can easily replicate this concept at home. And save yourself $210.00!

Thermic Bottles
$210.00


Other Montessori ideas include having the control of error provided so that children can check their own work. Letting them plan their own day. Having work on a mat or a tray to delineate your work space from another's. Freedom with responsibility. Child-size authentic tools. Not doing something for a child that he/she can do on his/her own. Using the correct vocabulary for something from the beginning. These ideas can be universally applied.

Often you can also be quite frugal and purchase simply the control chart for something (Botany Cabinet, Geometric Cabinet, Biome Puzzle Maps) or the stencil (Grammar Symbols), and have that be enough to add a great deal of new content to your homeschool curriculum. I'm happy to help anyone who is puzzling over what is a must-have versus a nice-to-have material.

Botany Cabinet Control Chart
$17.50


Geometric Cabinet Control Chart
$17.50


The special circumstance that I am facing here is that the official Reading / Sentence Analysis Set has been found to have some flaws. I began with the Mandala Classroom Resources Sentence Analysis Template and Making Sense of Sentence Analysis ($55.00) set of lesson plans. The description stated

    If you've had difficulty teaching sentence analysis with the traditional charts and boxes, you're not alone. To help you enjoy this important part of the curriculum, we've eliminated the grammar discrepancies in the charts and modified the content of the boxes to match the revised charts. We've keyed in on the essentials and prepared the sentences--to make it easier for you. Everything is organized clearly and is in photocopy-ready format for your permanent use.


So, I was intrigued. How did they change this particular material and why?

When the lessons arrived I discovered that they had made four changes to the teaching of Sentence Analysis, including unifying the symbols and dropping some of the charts. Most importantly, they eliminated the diagram with ten orange circles and the arrows which go to them. Orange is the color for Adverb in the Montessori Grammar work, and only four questions modifying a verb (why? how? when? where?) actually yield adverbs. These four (Cause, Manner, Time, Place) arrows I just finished dyeing orange.

Reading / Sentence Analysis Set
$191.50


The six eliminated orange arrows have questions which actually lead to Prepositional Phrases, which are not adverbs

    with whom? with what?

    by whom? by what?

    by means of whom? by means of what?

    from what? from where?

    what for?

    of whom? of what?


Here is the traditional working chart for Sentence Analysis, where you can see the long list of questions (click to enlarge):

Sentence Analysis Working Chart
$19.90


Sentences which have prepositional phrases as the indirect objects, such as "She gave the ball to the baby," are confusing to the children, since "baby" is the object of the Preposition and not the indirect object of the verb. If you write, "She gave the baby the ball," "baby" can now correctly be identified as the indirect object. I think that clarifying this makes a lot of sense!

However, if most of the working charts for Sentence Analysis can no longer be used, I'm left with no choice but to create materials for our shelves. The people at Mandala have done a tremendous amount of work in creating new charts, new sentences for analysis, and so on. I do recommend it! But they have not created a correspondingly revised hands-on material, since Montessori teachers can simply remove the now-unncessary components from the boxes they already have on their classroom shelves. I, however, hadn't bought it yet and I am NOT willing to purchase something expensive from Holland and then pack up half of it to be never seen again!

Since we were so fortunate in receiving a donation of wooden pieces last week, I've simply dyed the appropriate shapes the appropriate colors. The questions are written on the classroom charts and on each child's personal charts, so I'm not actually writing the questions on any of the arrows. I did dye more pieces than we needed, just to have them, but the bare minimum needed to accompany the Mandala material is

    black (Noun color):
    one large circle, one medium circle, one small circle, three arrows

    red (Verb color):
    one large circle

    blue (medium blue, Adjective color):
    three triangles, three arrows

    orange (Adverb color):
    four small circles, four arrows


The full tutorial with dyeing instructions will be next. And, of course, photos!

Making a New Sentence Material: How