This post will make the most sense if you read the two before it:
A HUGE thank you to Don Morris, Aviation Technologies Professor at SIU, and well-known for Intricate wooden laser cut engine kits with functional gears, pistons, valves and cams (article from Geeky Gadgets) for this donation!
Since we were so fortunate in receiving this large donation of wooden pieces last week, I'm able to handmake the Montessori Sentence Analysis material and make it just the way I want it, simply dyeing the appropriate shapes the appropriate colors! The questions are written on the classroom charts and on each child's personal charts, so I'm not actually writing the questions on any of the arrows. I did dye more pieces than we needed, just to have them, but the bare minimum needed to accompany the Mandala material is
- black (Noun color):
one large circle, one medium circle, one small circle, three arrows
red (Verb color):
one large circle
blue (medium blue, Adjective color):
three triangles, three arrows
orange (Adverb color):
four small circles, four arrows
Dyeing Instructions
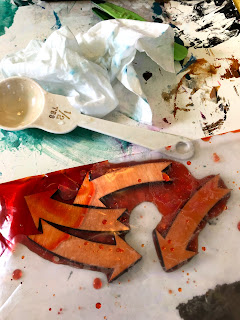
I followed the directions in How to Make Brightly Colored Food-Safe Wood Stain. For just a few pieces (3 or 4), a snack size ziploc baggie is fine. For larger quantities I used a quart sized bag. I did not increase the quantity of the dye recipe when I upped the bag to quart size, since even a tablespoon of dye is extremely strong.
I found that the liquid food coloring was easier (except for the black) since it dissolves right away into the warm water. For the black with liquid food coloring, you either need to dye pink and then overdye black (since black liquid food coloring tends towards the green) or use the gel. If using the gel, you need to zip the bag shut, massage the gel into the warm water until dissolved, and then open the bag and add your pieces. It is a bit of a pain, but it does save time over dyeing once and then overdyeing.
For the liquid food coloring, I used McCormick and for the gel food coloring I used Tylina Sweetshop Black Gel, 0.7 oz. I got the McCormick at the grocery store and the Sweetshop at Party City.

For either kind of coloring, I placed the pieces in the bag, massaged the color onto both sides of each pieces, laid down the bag so that the liquid was all around them, and then started the timer. I flipped the bag over several times while it was dyeing, and would massage the color (through the baggie walls) on the pieces when I did it. Using a pair of plastic tweezers to take the pieces out saves your fingertips from being dyed. And I just placed them on a cookie drying rack placed over a folded towel to air-dry.
This was surprisingly easy and each batch actually took only a few minutes!
Black Recipe
liquid food coloring
- 5 drops red, 1 T warm water, 3 minutes
allow to dry, then overdye with
5 drops black, 1 T warm water, 6 minutes
Black Recipe
gel food coloring
- 9 drops black, 1 T warm water, 10 minutes
Red Recipe
liquid food coloring
-
10 drops red, 1 T warm water, 5 minutes
Medium Blue Recipe
liquid food coloring
- 8 drops dark blue, 1 T warm water, 10 minutes
Orange Recipe
liquid food coloring
- 2 drops yellow, 3 drops red, 1 T warm water, 3 minutes
This post contains affiliate links to materials I truly use for homeschooling. Qualifying purchases provide me with revenue. Thank you for your support!


 Immersive Experience
 Immersive Experience


No comments:
Post a Comment