Saturday, January 6, 2024

2024 Story of Written Language Booklist

The Montessori Fourth Great Lesson -- How Writing Came to Be -- is the first topic for the Bongos in January. From there we will move into Structured Word Inquiry (SWI), which is a spelling curriculum that takes a linguistics-infused approach, blending phonology, morphology, and etymology into how you explain spelling to children from the very beginning of their instruction.

For more on SWI, I highly recommend Fiona Hamilton over at wordtorgue. She sends out weekly lesson ideas tied in with a picture book you can read (#engagewthepage).

I've taught the Fourth Great Lesson many many times, so I have notes all over the place. Here are the stories and activities we did this time around:


WEEK ONE

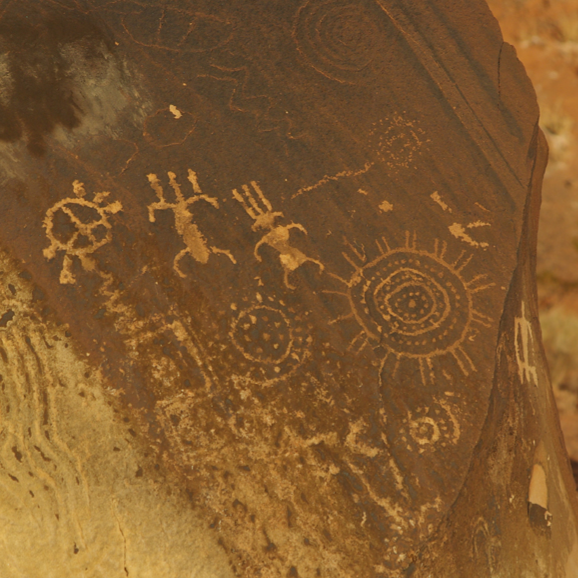
Cave Painting / Picture Writing

    introduction to the Story of Written Language!

    read How the First Letter Was Written
    from the Just-So Stories by Rudyard Kipling (this is just for fun)

    activity - draw a picture message and trade it with a partner and see if they can follow your instructions

    bonus book - some children also read The First Drawing by Mordecai Gerstein


Cuneiform

    describe life in Ancient Mesopotamia, the Sumerians, and cuneiform

    find the Mediterranean Sea on a globe, discuss "Cradle of Civilization"

    look at a picture of a clay tablet
    (History of Language card set from Clocca Concepts)

    look at Nebuchadnezzar's name in cuneiform
    (chapter 18 of A Child's History of the World by V.M. Hillyer, online at Project Gutenberg for free)

    activity - use play dough and a popsicle stick to make a cuneiform-inspired "clay tablet"

    bonus books - some children also read the Sumerian section of The History of Counting by Denise Schmandt-Besserat and the "Marks in Mud" section from the Childcraft book, pp.142-149


Hieroglyphs

    describe life in Ancient Egypt
    (excerpts from chapters 5, 6, and 7 of A Child's History of the World)

    look at Cleopatra's name in hieroglyphs
    (chapter 6 of A Child's History of the World)

    look at a picture of the Rosetta Stone
    (1975 Childcraft Annual, The Magic of Words, p.163)


Just a note about this vintage Childcraft book which Zac got from his sisters and I had never read (he jumped up and excitedly brought it down from his room as soon as I said the words "Rosetta Stone"). It is well worth tracking down if you're teaching this topic!! I couldn't believe how wonderful it was.

The chapter "From Sounds to Letters" is an excellent resource for the Fourth Great Lesson, and "The Tale of the English Tongue" is perfect for SWI!


WEEK TWO

Ancient Egypt Bonus Week!


WEEK THREE

Alphabet

    read sections from the Childcraft book:
    "The Wonderful Invention," pp.164-167
    "The Alphabet Goes to Sea," pp.168-169
    "New Sounds and Shapes," pp.170-173
    "More Changes," pp.174-179

    read There's a Monster in the Alphabet by James Rumford

    for the MLB, we added this map of Ancient Phoenician travels around the Mediterranean Sea with the four versions of the letter "L" beneath it (Sinaitic, Phoenician, Greek, Roman) from Ox, House, Stick: The History of Our Alphabet by Don Robb

    bonus book - some children also read chapter 13 (The People Who Made Our A B C's) of A Child's History of the World


Illuminated Manuscripts


Printing Press


I absolutely love James Rumford's work and very happily own all of his books (see Dec 2021 post, James Rumford, My New Favorite Author).

I was thrilled to find that not only did he write an EXCELLENT book about the printing press (From the Good Mountain) but he wrote a detailed companion book that would be amazing for a Montessori teacher doing the Fourth Great Lesson, although I don't think he knew that's what he was writing (From the Good Mountain: A Companion Guide for Adults & Children: How Books Were Made in the Fifteenth Century). It includes paper making, tanning, gold beating, ink making, type casting, press making, typesetting, letter press printing, book design, illumination, and bookbinding.


This post contains affiliate links to materials I truly use for homeschooling. Qualifying purchases provide me with revenue. Thank you for your support!

Friday, January 5, 2024

Art History - Faith Ringgold

In my Art History 2023-2024 blog post, I decided January / February would be Faith Ringgold. Here are some resources and my planning notes:

Faith Ringgold
1930 - 2024


also

Faith Ringgold Dies at 93; Wove Black Life Into Quilts and Children’s Books
The New York Times - Apr 13, 2024

https://www.faithringgold.com

Harlem Renaissance Party blog post

Art History Kids - The Studio - February 2019


STORY QUILTS

Tar Beach book by Faith Ringgold

Crazy Victorian Patchwork - EXTREME Scrap-busting & Rampant Creativity
YouTube

Instructions for patchwork: A new book of patterns and instructions for making fancy patchwork from 1884 (PDF)
Internet Archive

Stitch Meditation Scrolls
YouTube
a sewing project option for a child who finds Story Quilts too intimidating, and a lovely use for old wooden spools

Cloth Weaving
YouTube
a way to make a fun new texture

Booklist for Story Quilts blog post


CIVIL RIGHTS MOVEMENT
This year Martin Luther King Jr. Day is Monday, January 15.

My Dream of Martin Luther King book by Faith Ringgold

A Celebration of Martin Luther King Jr. with Faith Ringgold's Art
Art History Kids

When Marian Sang: The True Recital of Marian Anderson (1939)
by Pam Muñoz Ryan

Claudette Colvin: Twice Toward Justice (1955)
by Phillip Hoose

Sit-In: How Four Friends Stood Up by Sitting Down (1960)
by Andrea Davis Pinkney

Let the Children March (1963)
by Monica Clark-Robinson

The Youngest Marcher: The Story of Audrey Faye Henricks (1963)
by Cynthia Levinson

Freedom Summer (1964)
by Deborah Wiles

Voice of Freedom: Fannie Lou Hamer, Spirit of the Civil Rights Movement
by Carole Boston Weatherford

Martin's Big Words: The Life of Dr. Martin Luther King, Jr.
by Doreen Rappaport

Memphis, Martin, and the Mountaintop: The Sanitation Strike of 1968
by Alice Faye Duncan

Belle, The Last Mule at Gee's Bend: A Civil Rights Story
by Calvin Alexander Ramsey and Bettye Stroud

Dr. Martin Luther King Jr. Art Guide (PDF)
Art History Kids

    Coming to Jones Road Tanka #3: Martin Luther King, 2010
    Faith Ringgold

    Dr. Martin Luther King Jr. Speaking (John Lewis Series), 2005
    Benny Andrews

    Hope Moving Forward, 2021
    Basil Watson

IMMIGRATION

We Came to America book by Faith Ringgold

William's House
by Ginger Howard

Emma's Poem: The Voice of the Statue of Liberty
by Emma Glaser

When Jessie Came Across the Sea
by Amy Hest

Oskar and the Eight Blessings
by Richard and Tanya Simon

HARLEM RENAISSANCE

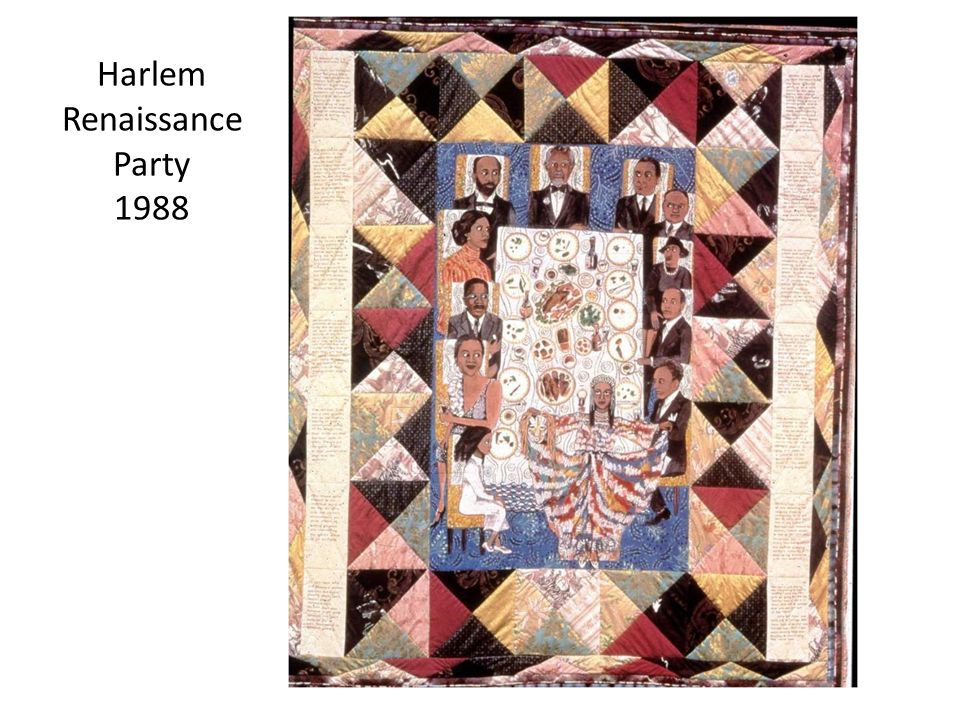
Harlem Renaissance Party book by Faith Ringgold

Harlem Renaissance Party quilt by Faith Ringgold

Henry Ossawa Tanner: His Boyhood Dream Comes True by Faith Ringgold

The Book Itch: Freedom, Truth & Harlem's Greatest Bookstore
by Vaunda Micheaux Nelson

Love to Langston
by Tony Medina

Langston Hughes (Poetry for Young People)
edited by by David Roessel & Arnold Rampersad

That Is My Dream!
text by Langston Hughes, illustrations by Daniel Miyares

Mules and Men
collected by Zora Neale Hurston

Zora & Me
by Victoria Bond & T.R. Simon

This Jazz Man
by Karen Erhardt

For Dizzy Gillespie, Queens Was the Place to Be and to Bop
The New York Times - Jan 5, 2024

Our List of Jazz Artists blog post
picture books, music & video links

    Louis "Satchmo" Armstrong

    Florence Mills

    Thomas "Fats" Waller

    Edward "Duke" Ellington

    Bill "Bojangles" Robinson

    George Gershwin

    Billie Holiday

    Charlie "Bird" Parker

    John “Dizzy” Gillespie

    Thelonious Monk

    Melba Liston

    Ella Fitzgerald

    Ray Brown

    John Coltrane


Discovering Great Artists: Hands-On Art for Children in the Styles of the Great Masters

by MaryAnn Kohl and Kim Solga
p.104 - "Quilted Work" activity
available online as a FREE PDF from Bright Ring Publishing


week of Jan 1:

    Thu/Sat - have children work in pairs to make Wet Felted Geodes to serve as their pincushions during the Story Quilt project

    this is a great way to use up scraps of wool roving yarn as well!


week of Jan 8:


week of Jan 15:

    Mon - read Martin's Big Words: The Life of Dr. Martin Luther King, Jr.
    by Doreen Rappaport


    Tue - put 20 pins in your pincushion, choose one spool of thread, choose two cards of buttons, cut scraps to desired size/shape (consider a seam allowance if you don't like the look of raw edges)

    sort the remaining fabrics into 8 boxes:

      green
      blue
      purple
      pink & red
      yellow & orange
      brown
      black & grey
      white & gold


    Wed - arrange the design of your fabric scraps and pin into place


    Sat - introduce techniques for transferring shapes (chalk, brown paper patterns), introduce new knots (tailor's knot to begin thread, quilter's knot to end thread)


week of Jan 22:


week of Jan 29:

    Mon - read My Gandhi Story by Nina Sabnani, recommend some additional books on nonviolent protests, work on Story Quilts


    Tue - introduction to immigration

    read We Came to America by Faith Ringgold, work on Story Quilts


    Wed - read When Jessie Came Across the Sea by Amy Hest, work on Story Quilts (new skill: how to sew on buttons)


    Thu - read Oskar and the Eight Blessings by Tanya Simon, work on Story Quilts (new skill: embroider details with back & satin stitch)


    Sat - work on Story Quilts


week of Feb 5:


week of Feb 12:


week of Feb 19:


week of Feb 26:


This post contains affiliate links to materials I truly use for homeschooling. Qualifying purchases provide me with revenue. Thank you for your support!

Thursday, January 4, 2024

Science Club - Building Cardboard Boats

Our Jan / Feb / Mar / Apr topic for Science Club is building our entries for the annual Great Cardboard Boat Regatta held at SIU's Campus Lake!

Waldorf curriculum-wise, this project goes with the Building and Measurement themes of Third Grade math. Here are some of my notes:


Session 1
Thu Jan 4

    find out student prior knowledge about the Cardboard Boat Regatta

    ask students who had participated in the Regatta last year to share about their experiences building and racing their boats, allow plenty of time for all students to ask questions and comment (one hour)

    show pictures from the 2022 race and the 2023 race, make notes on which qualities make a boat do well

    have students sit separately from one another and draw their OWN ideas about a boat design (ten minutes)

    bring the children back together and have them present their designs

    have students rearrange themselves so that children with similar design ideas are together; have students rearrange themselves so that children who think they would work well together are together

    based on the results of this process make final decisions about teams: we have four teams (two teams of 4 and two teams of 2)

    pass out graph paper to teams and have them make a scale drawing

    pass out rulers and yardsticks to teams and have each group outline their boat's length and width on the floor using masking tape


Session 2
Thu Jan 11

    in advance: teachers watch this video!

    share formula for calculating how high up the water will come on the side of your boat, depending on the weight of the children that are in it (and the corresponding volume of water you will displace) and the footprint of the boat

    do a demonstration to prove this idea:
    - place a large pot that weighs 5# into a tub of water and mark where the water comes up on the side of the pot
    - fill a container that has a smaller footprint with the same amount of weight and mark where the water comes up on the side of it
    - the container with the smaller footprint will ride deeper in the water

    weigh all the members of your group individually (round to the nearest whole pound) and find the sum

    use a ruler to calculate the area of your boat's footprint

    run the formula for each team (total weight of children divided by 62.4 = cubic feet of water to be displaced; divide that number by the area of your boat in square feet, then multiply that by 12 to find how high up the water will rise on the sides of your boat in inches)

    revise the shape of your boat's footprint, if needed, to get that number to be 2 or 3 inches

    make a decision about how high the sides of your boat should be


Session 3
Thu Jan 18

    goal: build a 3-D model of your boat using old file folders

    we have kept the tape footprints on the floor this whole time and I think they are really useful to the children

    last week we calculated how high the side of the boat would be, so now they have all three dimensions!

    each group went with a scale of one inch = one foot

    print one inch graph paper (FREE on TpT) and give four sheets to each group along with four old file folders, scissors, pencils, a ruler, clear tape, and a black Sharpie

    we had two light boxes available as well

    the children drew each piece of their boat on the graph paper and then placed the graph paper on the light box with the file folder on top, transferred the lines to the file folder, and cut them out

    two teams finished their models this week and two teams (which have more complex designs) will use next week's class to finish theirs


Session 4
Thu Jan 25

    decide on your team's purpose for making a boat (to be artistic, to build things, to win) and whether you want to hear suggestions of "how" it should be build or use your own ideas

    watch How to Make a Cardboard Boat That Wins video from Patriot Contraptions

    make notes on building suggestions from the video plus building suggestions from our librarian friend

    revise designs and/or make a second file folder model, if needed


Session 5
Thu Feb 1

    learn our new song, which we will sing at the beginning and end of each Science Club meeting, to keep us in the right frame of mind:

      Sing ho for the glorious adventure

      Sing ho for having lots of fun

      All that matters is that we learn to measure

      And that we don't leave out anyone!


    label all sides of your file folder model boat with letters

    measure and draw one side of your boat (do 3 layers of cardboard alternating grain), label pieces so I can cut them over the weekend


    Notes

    - January: choose teams, design your boat, make a scale model

    - February: measure and cut all cardboard pieces

    - March: assemble the boats

    - April: do field trips to practice rowing (race is Sat Apr 20)

    - get donations of yardsticks (1 per child) and corrugated cardboard

    - order 12 rolls of duct tape per group (white for the mermaid boat, silver for the other three)

    - it works best to have students lay out and measure cardboard in the driveway where there's lots of room

    - have kids place cardboard which needs to be cut in the living room

    - have kids place extra uncut cardboard in the library

    - cut cardboard on Saturdays with Kamea

    - boats-in-progress will be stored in the shed (leave in place Thu/Fri so glue can dry, move to shed Sat AM, move back to house Thu PM)


Session 6
Thu Feb 8

    continue measuring and drawing lines for pieces to be cut out

    (change of strategy: instead of drawing one piece three times, we decided to use today to draw EACH piece of the boat ONE time, so that those pieces could act as patterns once they were cut out)


Session 7
Thu Feb 15

    print a set of rules for each team's folder

    sort available cardboard pieces into small, medium, and large

    use patterns cut from last week to trace and label 2, 3, or 4 of each piece (depending on your boat design)

    write a note and tell me how many more pieces you need to cut


    for next week:
    - test flour/water proportions for paste
    - buy 10 lb flour
    - inventory supply of caulk & liquid nails
    - order three sheets of cardboard per team


Session 8
Thu Feb 22

    make a batch of flour/water paste (total time 30 minutes)

    1 cup flour : 4 cups water
    add enough water to flour to make a smooth mixture when stirred
    put 4 cups hot tap water into saute pan and add flour/water slurry
    bring to a boil while stirring constantly
    take off heat and let cool while stirring constantly

    have students make their "sandwiches" (paste together the layers for each side of the boat, alternating the grain of the cardboard)

    pass out colored dot stickers (red, yellow, green, blue) for marking each team's rolls of duct tape and cardboard pieces

    have students do an inventory and make a chart of how many boat pieces are stacked/pasted and how many still need to be traced/cut

    carry in a large donation of cardboard - 8 foot x 7 foot rectangles - 12 sheets @ $4.00 per sheet - thank you to Ms. Bridget and Evelyn!


Session 9
Thu Feb 29

    Today the goal was for each team to use their inventories, their patterns, and their three sheets of cardboard to trace ALL REMAINING boat pieces. Instead we discovered that many teams were missing pattern pieces. They spent today going back and measuring their file folder model boats (because they didn't have measurements written down anywhere) and figuring out the missing patterns and tracing those.

    So, to recap.

    I think Session 1 with considering design ideas, choosing teams, making a scale drawing, and marking the footprint of your boat on the floor with masking tape (length x width) was good.

    I think Session 2 with calculating the weight of all the people in your team, using the formula to determine how high up the water would come up the side of your boat, and deciding on the height of the walls was good. Although we did just end up telling them it needs to be 12 or 18 inches. But I think it did help them picture it as a boat.

    I think Session 3 with using old file folders (and a light box) to make a 3-D scale model of your boat with file folders was good.

    BUT

    I would change Session 4 to be labeling each side of the file folder model with letters or symbols and then making a chart that has organizational columns.

    - the name of the piece (side of point)
    - the letter/symbol for the piece (C)
    - the dimensions (1 ft x 1 1/2 ft)
    - how many of those pieces need to be cut
    - pattern made (check off when done)
    - pieces cut (use tally marks to count, then check off when done)

    Then in Session 5 they can measure and make all of their patterns. They are using yardsticks, drawing lines in pencil, tracing the final lines in Sharpie, writing the piece symbol inside the shape, marking it with a colored dot, and making me a pile of things to be cut.

    We used four colors of file folders -- yellow, red, blue, green -- and then I gave them dot stickers that match those colors so that they can organize their cardboard pieces, duct tape, and so on by team.

    The color coding is working out great. But keeping themselves organized re. the patterns and the tracing of all of those pieces has been hard. Even with the adults doing all of the cutting on the weekends, and taking that off the to-do list for the children, they are having a hard time keeping track of where they are in their design.


Session 10
Thu Mar 7

    Today we had two additional parent volunteers and each team had a dedicated adult. We made charts like the one I brainstormed last week and the adult stayed with the team until ALL remaining pieces were successfully traced. It worked like a charm. So next time I would do the dedicated adult much sooner. I'm not sure about a dedicated adult right away, like session 6, because I think it was valuable for them to make one sandwich (pasting together all layers for one side of the boat) all on their own and realize that they didn't have as much traced as they thought they did -- and be open to help -- as opposed to someone swooping in and saving them when they weren't ready to ask for assistance yet. Something to think about.


Session 11
Thu Mar 21

    make a batch of flour/water paste

    two teams (red, yellow) assemble sandwiches, using paste

    two teams (green, blue) add side and bottom pieces to thicken the layers on existing large boxes, using duct tape to cover all seams EACH time you add a piece of new cardboard

    we are curious to see which strategy works best! is it better to have lots of tiny seams, all waterproofed with duct tape, or to laminate thick side and bottom pieces and then use a waterproof adhesive (caulk or liquid nails) to hold the seam when they are put together

    they are getting excited to see their boats actually coming together! as we were carrying one to the shed, a child remarked to me "this is a very boat-ish boat"


Session 12
Thu Mar 28

    watch Middle School Cardboard Boat Race

    finish boat assembly

    two tubes per team of waterproof adhesive (caulk or Liquid Nails)

    reinforce exterior, begin to waterproof exterior (duct tape)


Session 13
Thu Apr 4

    reinforce interior, begin to waterproof interior

    note: the Liquid Nails did not work as well as the caulk

    we like Dap 18526 White Kwik Seal Plus Kitchen & Bath Adhesive Caulk, which is very strong and comes in tubes that do not require a caulking gun and therefore are easier for little hands

    we have used a lot of L- and U-shaped pieces of cardboard, both on the inside and outside of the boat, for reinforcement around the corners; use caulk as the "glue" for these pieces and then cover them with duct tape so they stay in place while drying

    choose boat names

      Kitchen Team / Yellow / "Silverstream"

      Library Team / Green / "The Most Original Boat Name Ever"

      Entryway Team / Red / "Pearl Moon"

      Living Room Team / Blue / "The GLZ"


Session 14
Thu Apr 11

    strengthening the outside some more, if needed

    finishing the waterproofing of the exterior

    note to self: a roll of white duct tape is only 20 yards; a roll of silver duct tape is 45 yards

    I wouldn't get the white again! that team ran out, but the silver tape is still going strong


Rowing Practice Field Trip
Sat Apr 13


Session 15
Thu Apr 18


The 49th Annual Great Cardboard Boat Regatta
Sat Apr 20


Total Number of Boats: 4

Total Amount of Time: 15 weeks @ 2 hours per week = 30 hours per boat

Total Cost: $567.51

Feb 1 - Amazon - 12 rolls duct tape per team - $277.31
Feb 4 - Amazon - ten utility knife blades - $3.28
Feb 21 - Bridget donate 12 sheets of cardboard @ $4.00 each - $48.00
Mar 28 - Amazon - 4 tubes caulk for Science Club - $38.92
Apr 13 - Field Trip @ http://www.littlegrassylakecampground.com - $140.00
Entry Fee - $15.00 per boat - $60.00


This post contains affiliate links to materials I truly use for homeschooling. Qualifying purchases provide me with revenue. Thank you for your support!

Wednesday, January 3, 2024

Introduction to Rounding

I put together a blog post of FREE TpT Worksheets for Rounding back on December 6, 2020 so check it out if you're looking for more resources.


Some math skills you need to practice abstractly because there aren't that many real-life instances of them. Rounding is a perfect example!

I will introduce Estimation in grade 2, but I wait on Rounding until grade 3. The Waldorf Third Grade curriculum lends itself extremely well to practicing this new skill in a wide variety of contexts (rounding with whole numbers, money, and time, as well as units of distance, mass, and capacity).

Reinforce in Fourth Grade and practice with Fractions.

Reinforce in Fifth Grade and practice with Decimals.

This week I introduced the idea of rounding on Monday. We practiced with a pile of fir cones (to the nearest 10), our ages (to the nearest 10 and 100), a ruler (to the nearest foot), and a clock (to the nearest hour and half hour).

Today I gave them a worksheet and hands-on activity to do from TpT:

Rounding with a Number Line ($3.00)
lots of scaffolding; rounding to 10s, 100s, 1000s, and 10,000s

Because we blend Waldorf and Montessori here, we use the Montessori color coding for place value. That means that I got out my light table translucent counters in the appropriate colors. Blue if we were rounding to the nearest 10. Red if we were rounding to the nearest 100. Green if we were rounding to the nearest 1000. Blue if we were rounding to the nearest 10,000.

I loved this hands-on activity that walks them through rounding step by step. First, you draw cards to determine your number. Next, you figure out which number is lower than and higher than your number, based on what you are rounding to, and place counters in the appropriate spots on your number line. Then you think about the halfway point. Finally, you look at your number again and see whether it is above or below the halfway point.

I like the record sheet too! You can fold the record sheet in half to do just five practice problems. Then if you feel you need more practice, you can unfold it and choose to do 10 problems or even 15.

The children worked in partners and they really enjoyed this activity.

you can also make your number with the Stamp Game for extra support

because the counters are color coded, you know which digit to focus on!


This post contains affiliate links to materials I truly use for homeschooling. Qualifying purchases provide me with revenue. Thank you for your support!

Tuesday, January 2, 2024

Educational Game: Gnoming A Round

If your child comes home and tells you that they're learning about negative numbers, that means that they are now playing Gnoming A Round!

This fun card game is great as a simple introduction to the concept of having less than zero. Jamie York suggests explaining this to children using the example of a bank account balance being overdrawn... as opposed to a number line, which is too abstract. With Gnoming A Round the lowest score wins (it's based on golf), so the subtraction cards are the best ones to get.


To keep scoring easy for the children to understand, we score this using the Mortensen materials. Based on the Montessori method, the Mortensen materials are plastic color-coded rectangular pieces that are hollow inside. When flipped upside down, they represent negative numbers.

To score the game, you tally up all of your positive cards by making a row of pieces that represent your positive points. You then tally up all of your negative cards by making a row of pieces that repesent your negative points. Each piece goes with a card (or set of cards, if you got a row of 3). Put the positive row and the negative row beside one another. Whatever sticks out at the end is your score. Why? Because the positive points and the negative points that match up perfectly have cancelled one another out.

This math manipulative is the perfect concrete way to do the scoring. Having it is extremely helpful. And the children love this game!


This post contains affiliate links to materials I truly use for homeschooling. Qualifying purchases provide me with revenue. Thank you for your support!

Monday, January 1, 2024

Is It Music?

One of my favorite Philosophy lessons!

Our artist for December, Yves Klein, is most famous for his nearly 200 monochrome paintings in International Klein Blue, but that wasn't his entire exploration of reductionism.

Klein also presented "The Specialization of Sensibility in the Raw Material State into Stabilized Pictorial Sensibility: The Void" in 1958. "The Void" was an entirely white gallery space with only an empty cabinet in it. Apparently the aura of his presence was artwork enough! "I will concentrate alone in the room, and then present a sensitive pictorial space to the public," he stated. Three thousand visitors arrived on opening night.

Yves Klein also wrote a symphony called "Monotone-Silence," a piece of music which consisted of one single chord played full force for 20 minutes and then the playing of silence for 20 minutes.

A Sound, Then Silence (Try Not to Breathe)
The New York Times - Sep 17, 2013


Is this music?

Today we tackled this question. We began by reading The Enchanted Symphony by Julie Andrews and Emma Walton Hamilton at snacktime. The children were astonished to hear about the concert for 2,292 plants in Barcelona during COVID, and even were startled to learn that plants grow better when classical music is played to them!

Then I explained the idea of Klein's symphony. Is this music? What is music?


We listened to four pieces and after each one we discussed if it WAS music, if it WASN'T music, and why.

If your child wants to share these pieces of music with you, they are here:

1) Pie Jesu sung by Anna Netrebko
from Requiem by Andrew Lloyd Weber

2) O Fortuna
from Carmina Burana by Carl Orff

3) Voice Piece for Soprano & Wish Tree
Yoko Ono

4) 4'33"
John Cage


I have taught this lesson many many times, always with these exact four clips. I will be very sad if they ever leave YouTube! I so enjoy hearing the children's responses to them. They have many thoughtful things to say.


This post contains affiliate links to materials I truly use for homeschooling. Qualifying purchases provide me with revenue. Thank you for your support!

Sunday, December 31, 2023

More Books for the In-Between Time

I have a special shelf in my chapter book area for the "in-between" books. These are books that look and feel like chapter books but they have large print and are still meant for beginning readers. Besides Spike: The Story of a Whitetail Deer (and series) and Picta the Painted Turtle (and series), here are the other titles I have on the lefthand side of that shelf:


On the righthand side of the shelf, I have books where the words are more difficult but there still aren't too many on a page and the print is still largish. The McBroom books also fall into this category.


Now that Zac is reading books on this shelf, I will probably be getting new ones. I'll keep this list up to date!


This post contains affiliate links to materials I truly use for homeschooling. Qualifying purchases provide me with revenue. Thank you for your support!